
This post contains affiliate links.
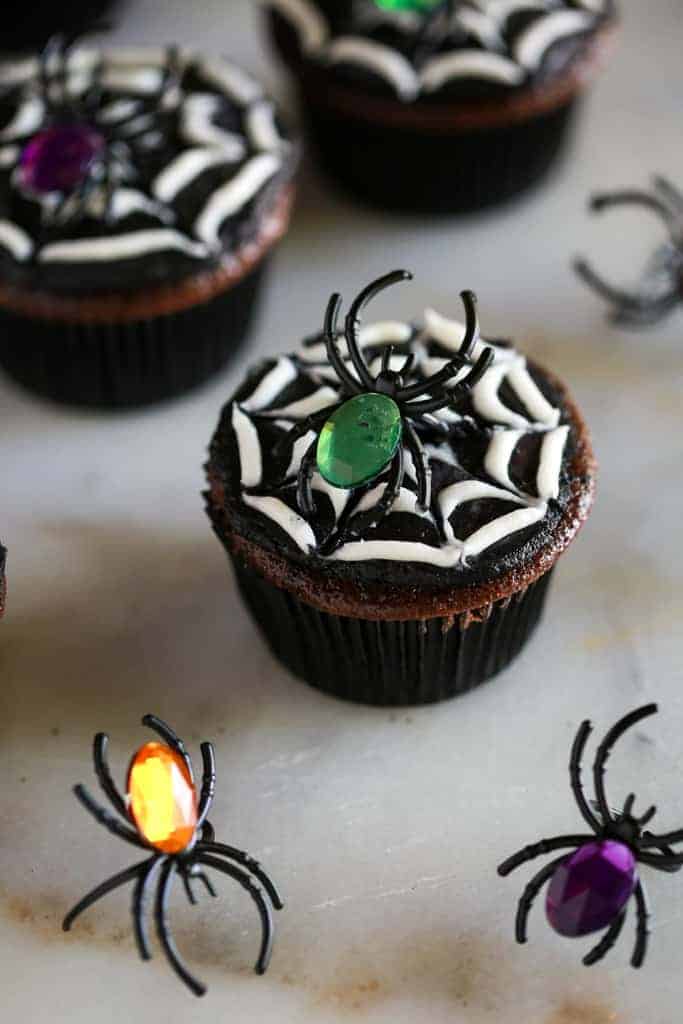
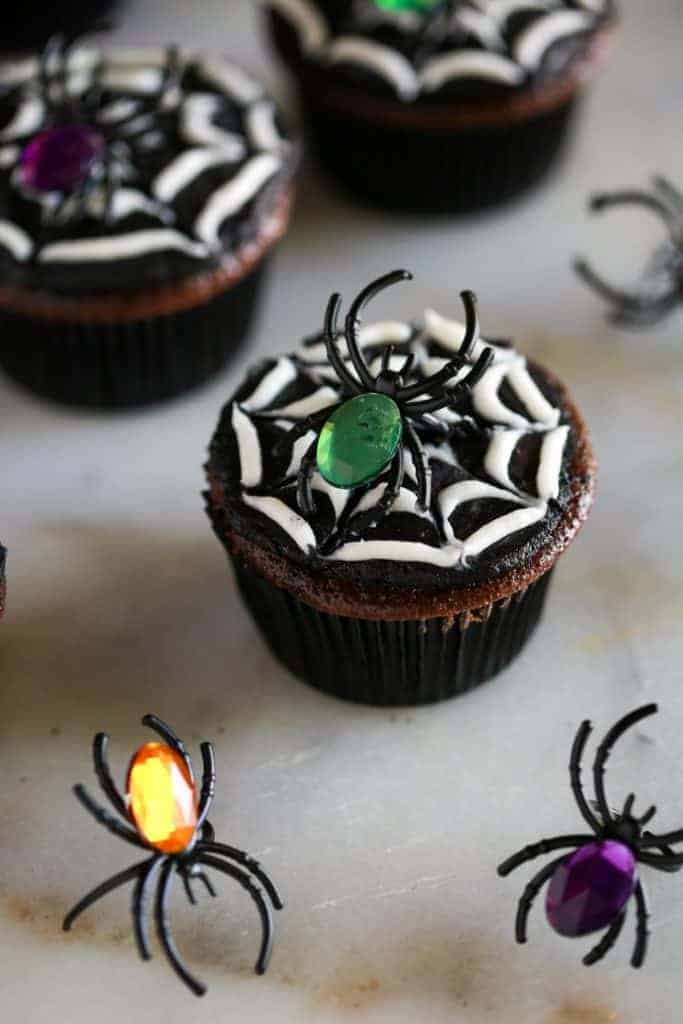
This Spider Halloween Cupcakes recipe is an easy, spooky cake decoration idea that your kids will love to help you make for Halloween! All you need is baked chocolate cupcakes, black and white frosting, and some fun toy spider rings.
Looking for more Halloween recipes? I love these Graveyard Halloween Brownies, Perfect Caramel Apples, or Mini Halloween Pizzas!
Why I love this Halloween dessert:
- Simple – This is the easiest treat to make this season while still being festive and impressive! If you're looking for more Halloween cupcake ideas, try my Witch Hat Cupcakes!
- Kid Favorite – My kids love helping me make these, and they are always a favorite Halloween treat at parties!
- Quick – Only 5 ingredients needed, and you can have these ready in just 30 minutes!
What do I need to make Halloween Cupcakes?
- 24 chocolate cupcakes baked in black cupcake liners
- 3 cups of chocolate frosting
- 1 cup white frosting
- Black food coloring
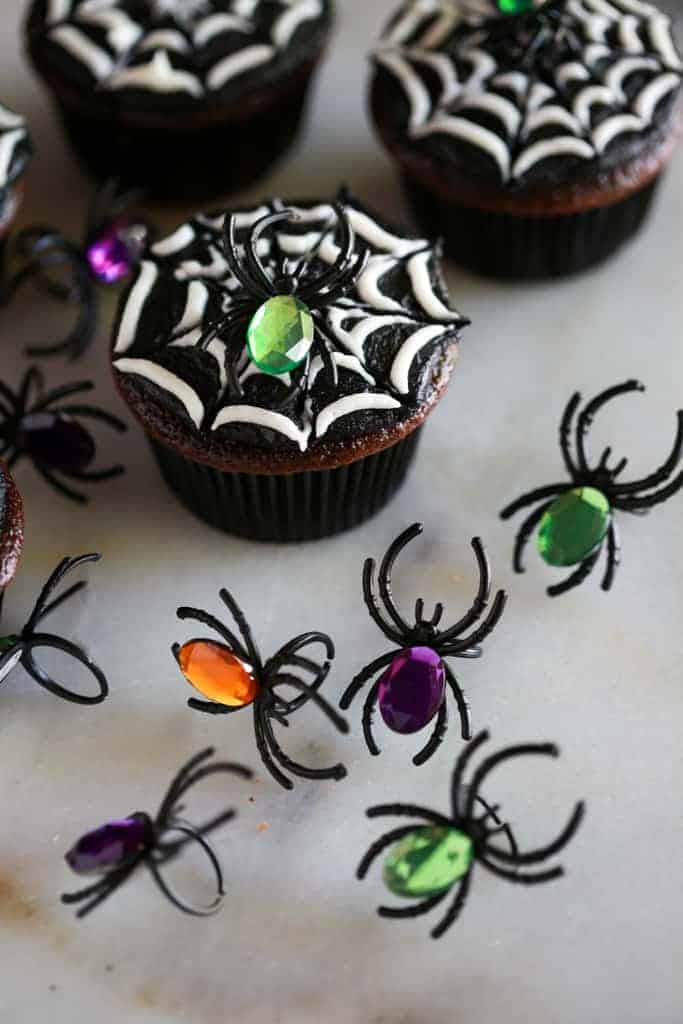
- Toy Spider rings (You can get jewel spider rings from Amazon)
Bake Cupcakes: Make the cupcakes and allow them to cool completely before frosting them. Fill them a little less than 2/3 full so that they bake with flat tops.
Make Chocolate Frosting: Add some black food coloring until you reach your desired black for the base frosting on the cupcakes.
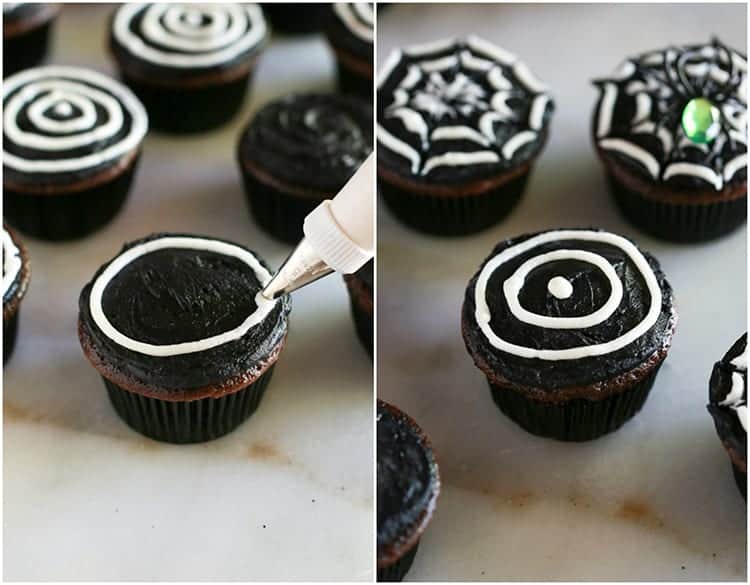
Frost Cupcakes: Frost a thin layer of black frosting on the tops of the cupcakes. Use a small frosting tip (or a ziplock bag with a corner cut) to pipe two white circles with the white frosting, and a dot in the center.
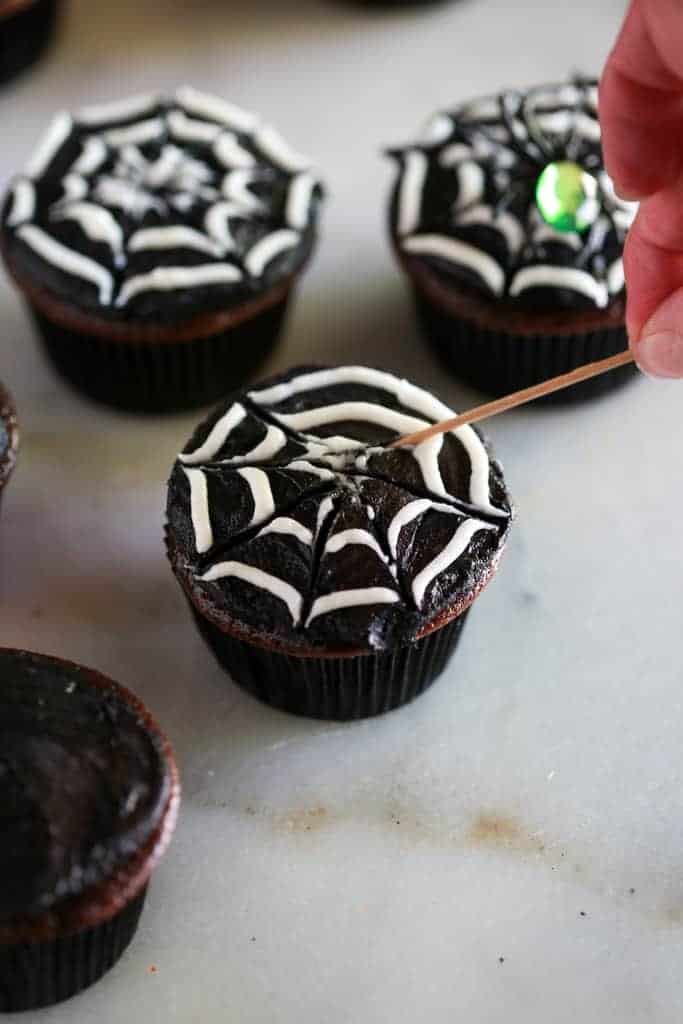
Make Spiderweb: Starting at the center dot, use a toothpick to pull a straight line out to the edge of the cupcake. Repeat around the cupcake to make a spiderweb. Stick the toy spiders on top. Serve these fun and easy Halloween cupcakes!
Pro Tip: I like to use chocolate frosting for the “black” frosting on the spiders because it tastes better and you'll need less black food coloring. I've also found that if you try and color white frosting using black food coloring, you'll end up with a slate grey color, and not pure black. Cocoa powder helps to turn the frosting a richer black color.
More Holiday Recipes:
- Dinner in a Pumpkin
- Homemade Caramels
- Chocolate Fudge
- Classic Pumpkin Roll
- Pumpkin Chocolate Chip Bread
- Chocolate Covered Pretzel Rods
- Reindeer Cookies
Halloween Spider Cupcakes
Ingredients
- 24 baked Chocolate Cupcakes, (I like to bake them in black cupcake liners)
- 3 cups chocolate frosting
- 1 cup white frosting
- black food coloring
- 24 toy spider rings
Instructions
- Fill your cupcake liners a little less than 2/3 full of batter so that they bake with flat tops. Allow the baked cupcakes to cool completely before frosting them.
- Make your chocolate frosting. Add some black food coloring to make the frosting black. Frost a thin layer of black frosting on the tops of the cupcakes.
- Use a small frosting tip (or a ziplock bag with a corner cut) to pipe two white circles with the white frosting, and a dot in the center.
- Starting at the center dot, use a toothpick to pull a straight line out to the edge of the cupcake. Repeat around the cupcake to make a spiderweb. Stick the toy spiders on top.
Nutrition
Nutrition information is automatically calculated, so should only be used as an approximation.
Text me new recipe ideas!
Simple, tasty ideas sent once a week. No spam.
Follow Me


I made these today and they worked out pretty well, but not as perfect as I would’ve liked. I made the white icing circles on several before I realized it was too thick, worked much better once I thinned the icing. I’m happy with the results and hope the kids love them! Thank you for such a cute idea. Too bad I can’t post a picture. 🙂
This looks amazing! I might make these for my son’s Kindergarten class, and be “that pinterest mom”. Hehe. 🙂
Oh I hope you do!! How fun!