This post contains affiliate links.
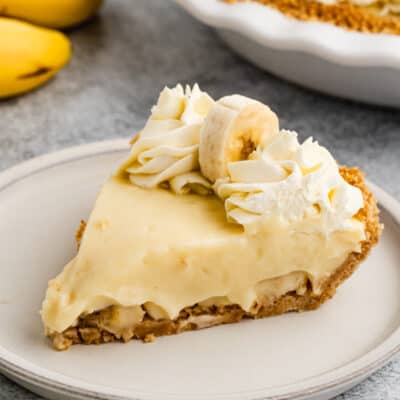
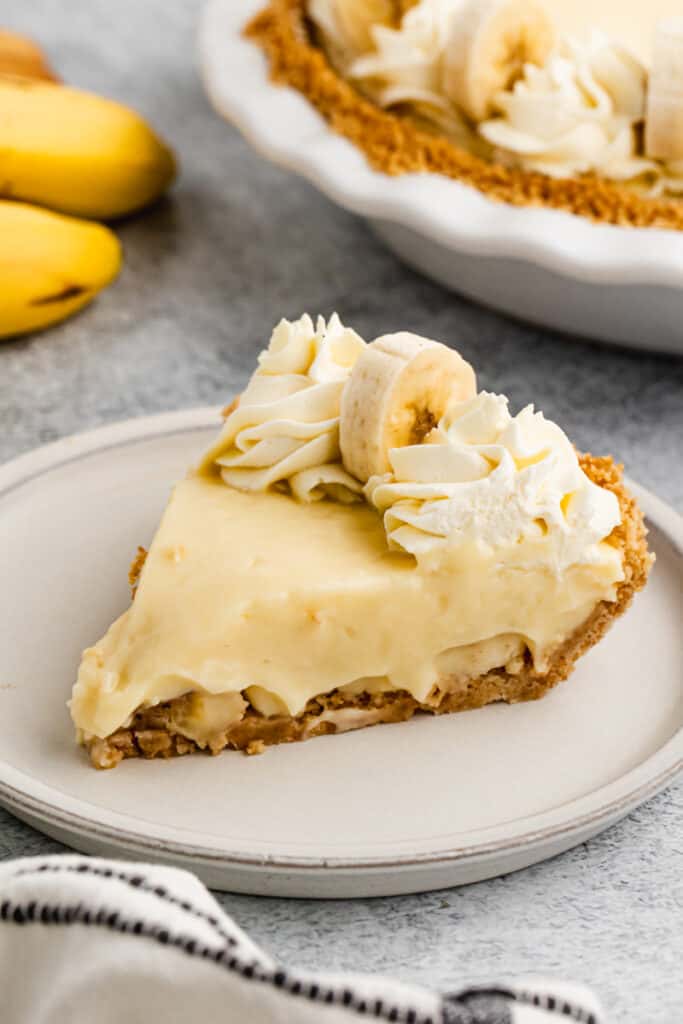
The most incredible (and easy) Banana Cream Pie recipe with homemade custard filling that holds together perfectly, layered inside a Nilla wafer crust. You'll never use a box pudding mix again!
You can browse all of my delicious pie recipes, and be sure to try the Key Lime Pie, Apple Pie, Pecan Pie, or a Lemon Sour Cream Pie.

What I love about this pie:
- The Filling: To make a truly excellent Banana Cream Pie, the pudding NEEDS to be made from scratch! This recipe if flavorful, holds together, and so velvety smooth.
- Nilla Wafer Crust really shines in this pie, and reminds me of banana pudding. If you prefer something else, you can use a graham cracker or traditional pie crust.
- Make Ahead: you can make this beautiful pie 1-2 days in advance, but I recommend reserving the bananas for topping on individual pie slices while serving, rather than inside the pie.
How to make Banana Cream Pie:
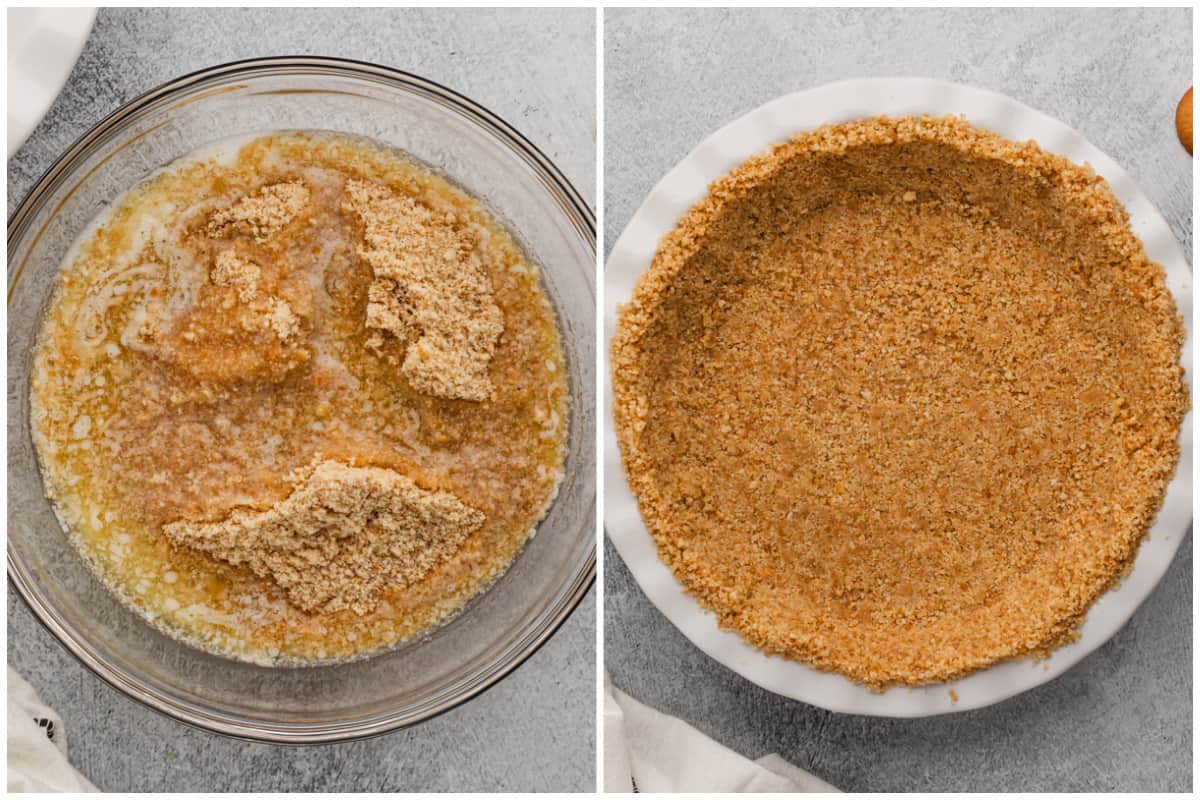
Prepare Crust: Add Nilla wafers to a food processor and pulse until fine crumbs (or crush them in a resealable bag, using a rolling pin). Add cookie crumbs to a bowl and stir in melted butter. Press mixture firmly into the bottom and up the sides of a 9” pie plate. Bake crust for 10 minutes, and then allow to cool completely.
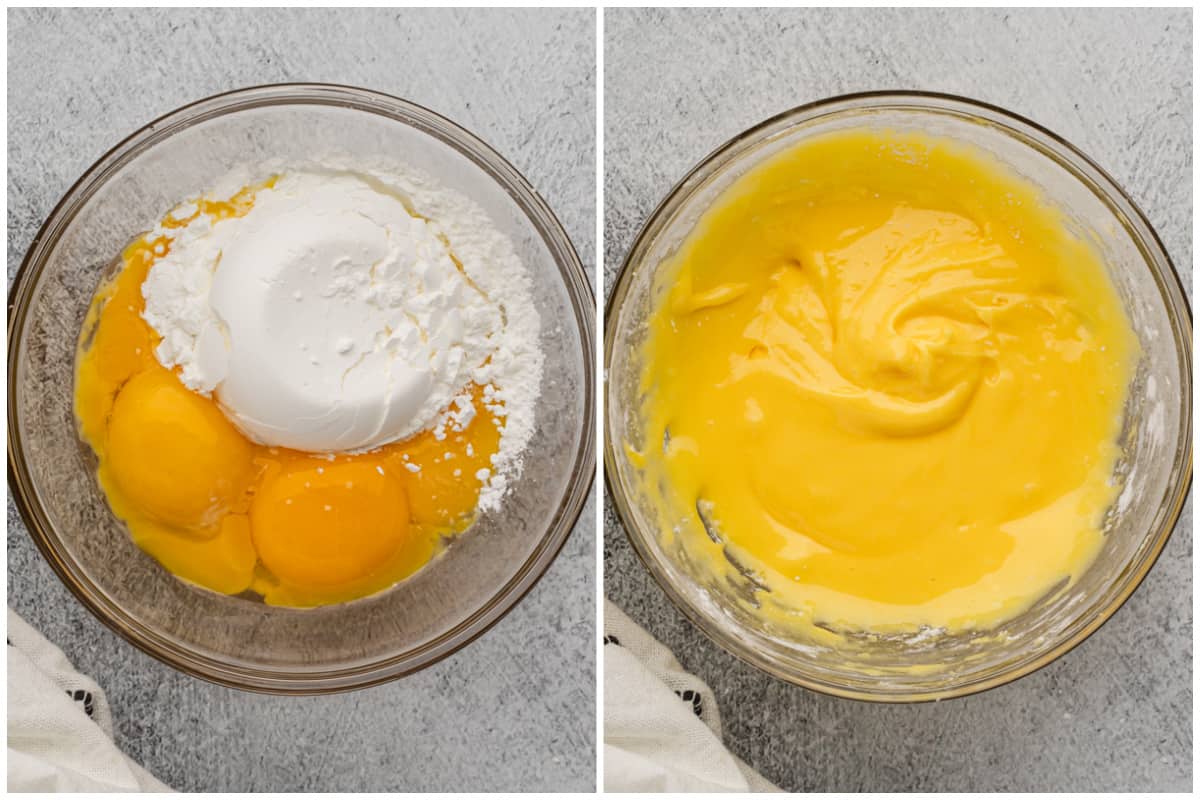
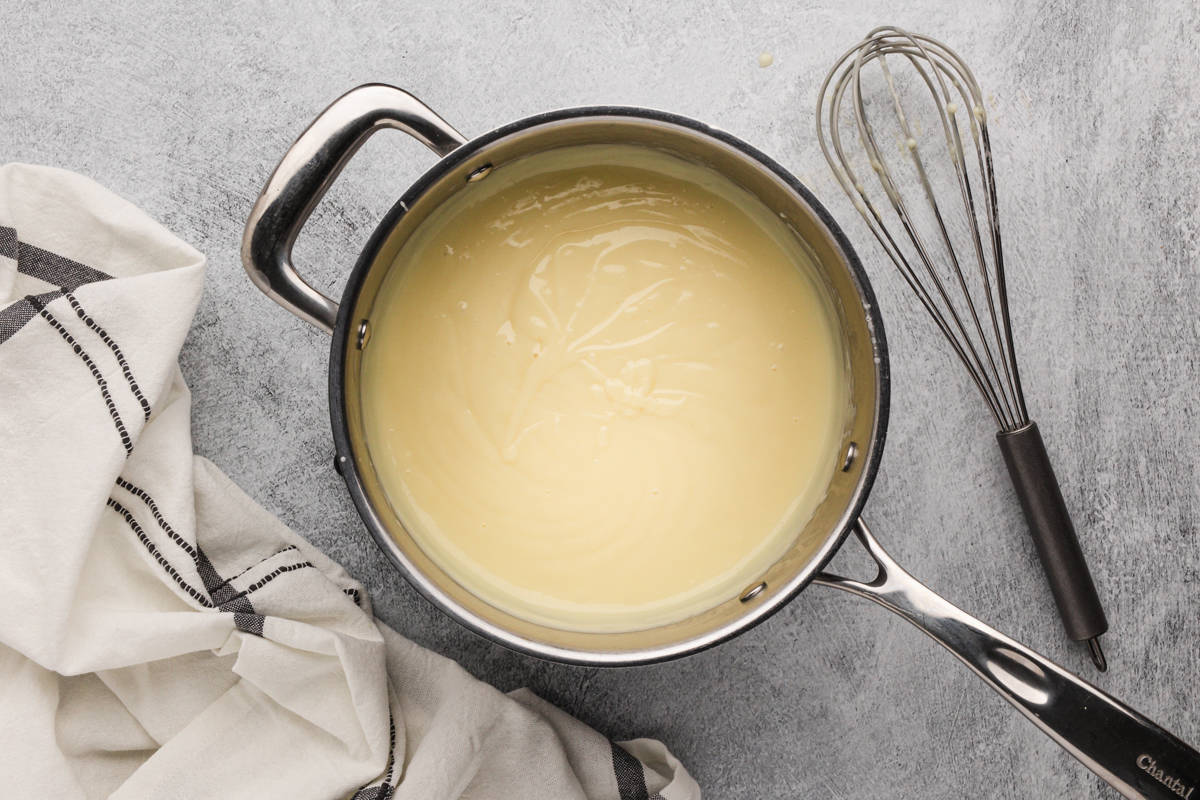
Make Filling: Mix egg yolks and cornstarch in a bowl until smooth. Set aside. Whisk in sugar, salt, and milk in a large, heavy saucepan. Cook over medium heat, stirring often, until it comes to a simmer.
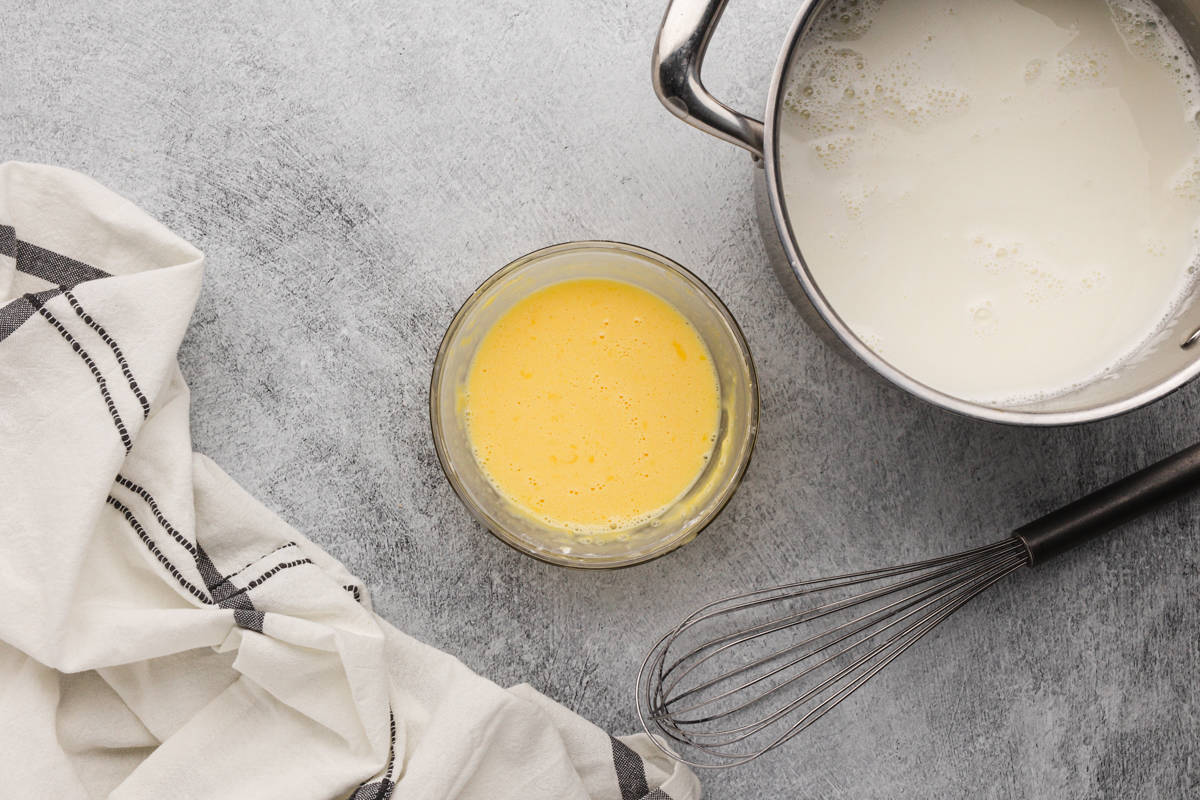
Temper Eggs: Spoon a big ladleful of simmering milk out of the pot, then very slowly whisk the milk into the egg yolk mixture, whisking constantly as you pour a slow steady stream, to temper the eggs (warm them up slowly, without scrambling them).
Cook Pudding: Pour the tempered egg mixture into the saucepan, whisking to incorporate. Cook, stirring constantly over medium heat, until the mixture has thickened (thick enough to coat the back of a spoon).
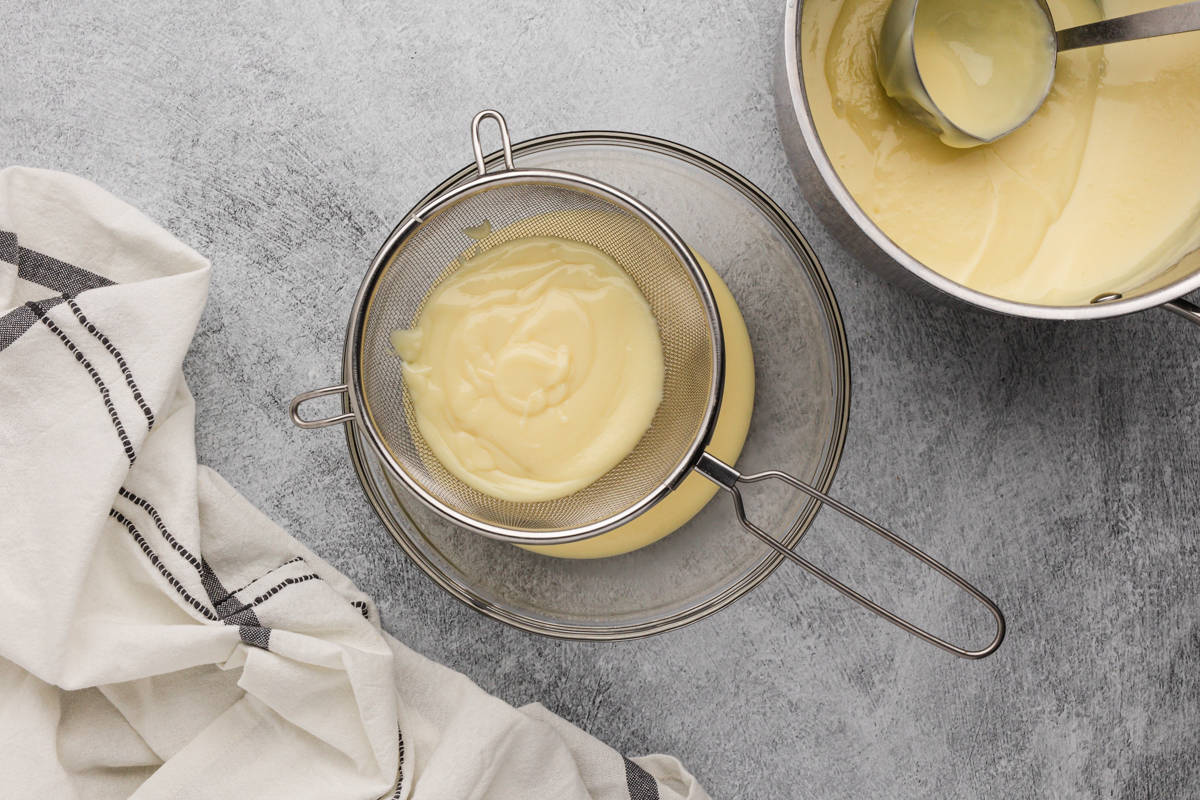
Strain: Remove from heat and stir in butter and vanilla extract. Strain pudding through a fine mesh sieve into a storage container. Lay a piece of plastic wrap directly over the pudding to prevent a skin from forming then cool for 30 minutes.
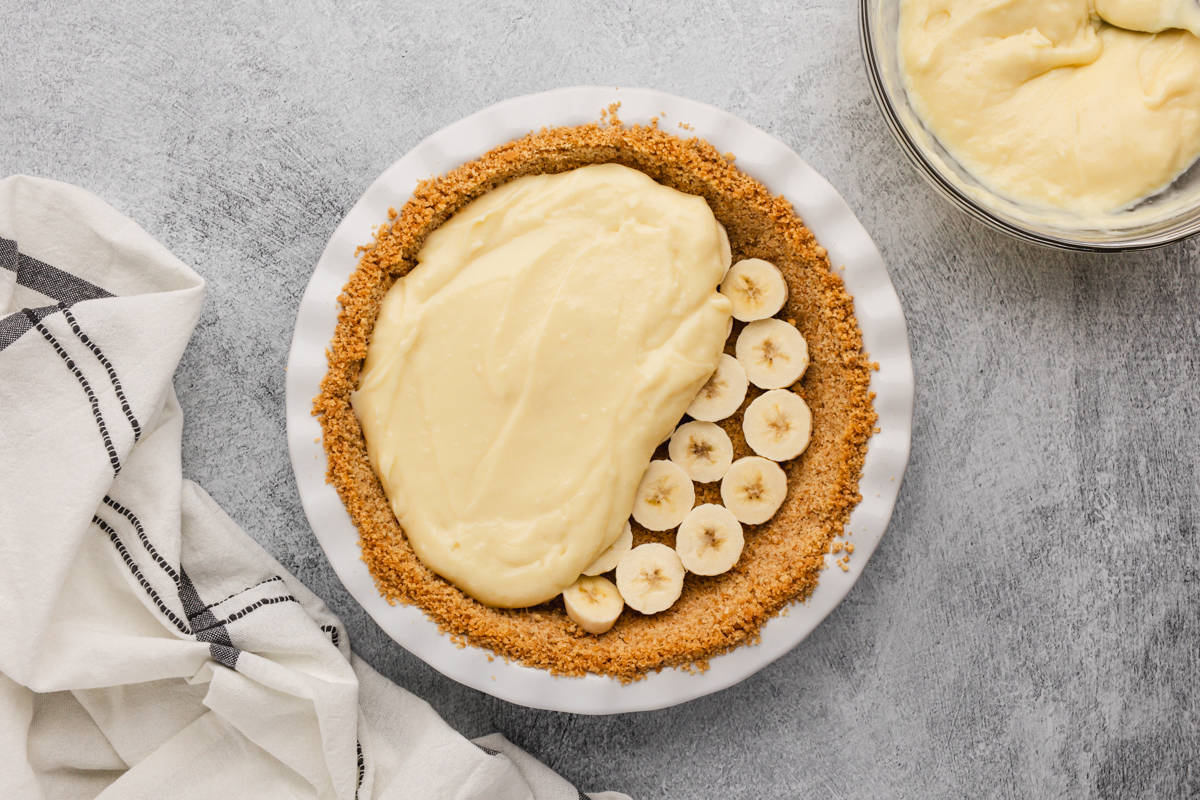
Layer Pie: Slice bananas into the bottom of the Nilla wafer crust, into an even layer then pour pudding over the top. Cover with plastic wrap again, so a skin doesn’t form, and refrigerate for at least 4-6 hours.
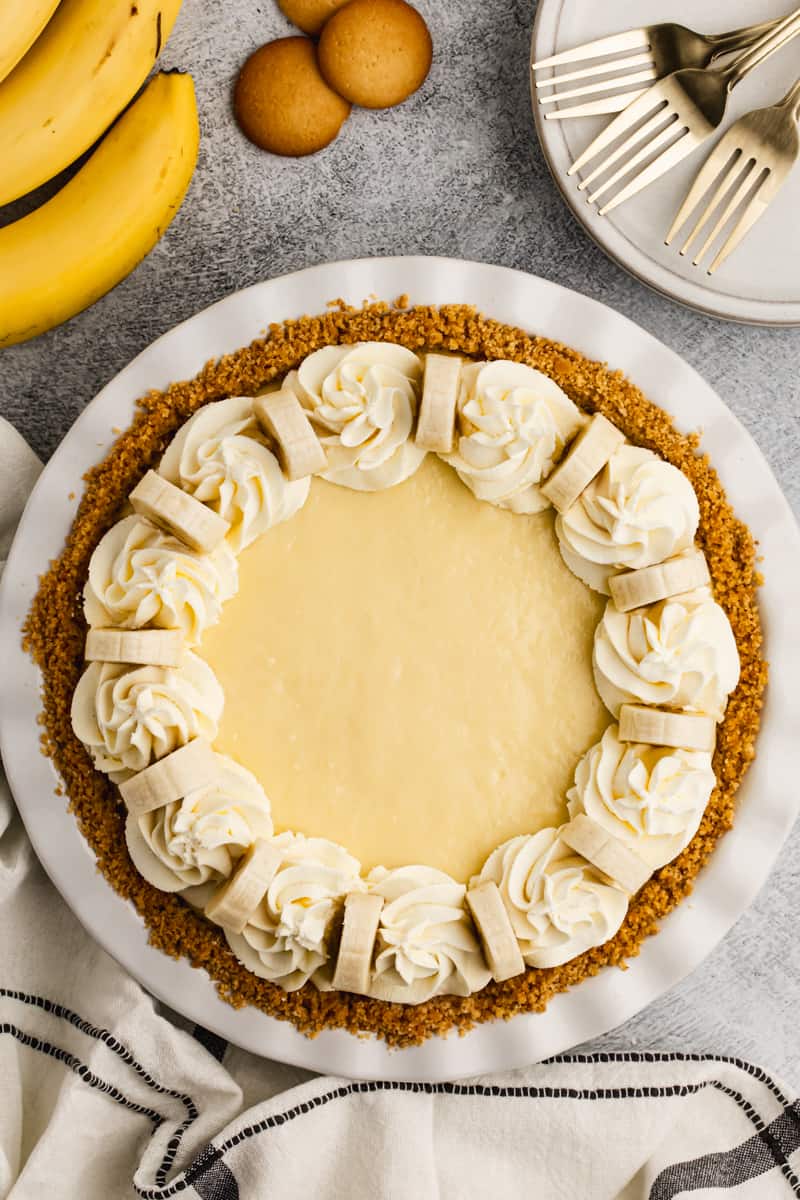
Whip Cream: Add heavy cream and powdered sugar to a mixing bowl and whip until peaks form. Smooth whipped cream over the top of the old fashioned banana cream pie, or pipe around the edge. Refrigerate, uncovered, for at least 4-6 hours before serving.
Make Ahead and Freezing Instructions:
To Make Ahead: Nilla wafer crust can be made several days in advance, stored at room temperature or in the freezer. Banana Cream Pie can be made 2-3 days ahead, but I recommend adding the bananas while serving the pie, and not placing them inside, so they don't get brown.
To Freeze: Don't add bananas, but otherwise make as instructed. Allow the pie to cool completely then wrap in plastic wrap and a layer of aluminum foil and freeze for up to 2 months. Thaw in the refrigerator overnight.
More Homemade Pies:
- Cherry Pie
- Lemon Sour Cream Pie
- Pumpkin Pie
- Oreo Cheesecake Pie
- Lemon Chiffon Pie
- Coconut Cream Pie
- Triple Berry Pie
- Peanut Butter Pie
Banana Cream Pie
Equipment
Ingredients
Nilla Wafer Crust:*
- 2 cups Nilla wafers, , crushed, (about 60 cookies)
- ⅓ cup butter, , melted
Filling:
- 4 large egg yolks
- 1/4 cup cornstarch
- 2 1/2 cups whole milk
- 2/3 cups granulated sugar
- 1/4 teaspoon salt
- 2 Tablespoons butter, , cut into pieces
- 2 teaspoons vanilla extract
- 3 large firm bananas, , sliced
Whipped Cream Topping:
- 1 1/2 cups heavy whipping cream
- 3 Tablespoons powdered sugar
Instructions
- Prepare the Crust: Preheat oven to 350 degrees F. Add Nilla wafers to a food processor and pulse until crumbs (or crush them in a resealable bag, with a rolling pin). Add cookie crumbs to a bowl and stir in melted butter. Use the back of a measuring cup to press mixture firmly into the bottom and up the sides of a 9'' pie plate. Bake for 10 minutes. Allow to cool completely before adding the custard filling.
- Banana Pudding: Mix egg yolks and cornstarch in a bowl until smooth. Set aside. To a large saucepan, add sugar, salt and milk to a large, heavy saucepan and whisk to combine. Cook over medium heat, stirring often, until it comes to a simmer.
- Spoon a big ladleful of simmering milk out of the pot, and very slowly whisk the milk into the egg yolk mixture, whisking constantly as you pour a slow steady stream, to temper the eggs (warm them up slowly, without scrambling them).
- Pour the tempered egg mixture into the saucepan, whisking to incorporate. Cook, stirring constantly over medium heat, until the mixture has thickened (thick enough to coat the back of a spoon).
- Remove from heat and stir in butter and vanilla extract. Strain pudding through a fine mesh sieve, into a storage container. Lay a piece of plastic wrap directly over the pudding to prevent a skin from forming. Allow to cool for 30 minutes.
- Slice bananas into the bottom of the nilla wafer crust. Pour pudding over the top. Place a small piece of plastic wrap directly on the surface of the pudding, so a skin doesn’t form. Refrigerate for at least 4-6 hours.
- Whip Cream: Add heavy cream and powdered sugar to a mixing bowl and whip until peaks form. Smooth whipped cream over the top of the pie.
- Refrigerate for at least 4-6 hours before serving.
Notes
Nutrition
Nutrition information is automatically calculated, so should only be used as an approximation.
Text me new recipe ideas!
Simple, tasty ideas sent once a week. No spam.
Follow Me
I originally shared this recipe November 2017. Updated November 2019 and November 2023.

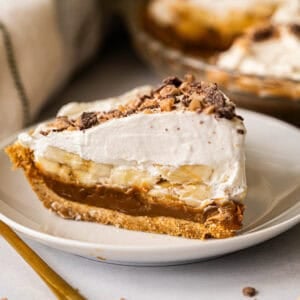


I used crushed oreo instead of Nila cookies, and made chocolate custard. It was awesome!
I love this website and Lauren, but this recipe did not work for me. The pudding turned out soupy (I had to put it in the freezer) and the topping I had to quit after 20+minutes of whipping with a stand mixer. 🙁
I followed the directions, even had help….
You didn’t cook your custard long enough. Or you didn’t add just yolks. If this happens you can add in a little corn starch. Teaspoon at a time to thicken. Or, bloom a package of plain gelatin for 5 min in 2 tablespoons of water, then add in to custard. It will then be pudding consistency