This post contains affiliate links.
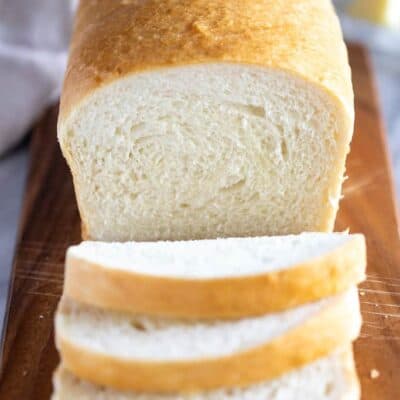
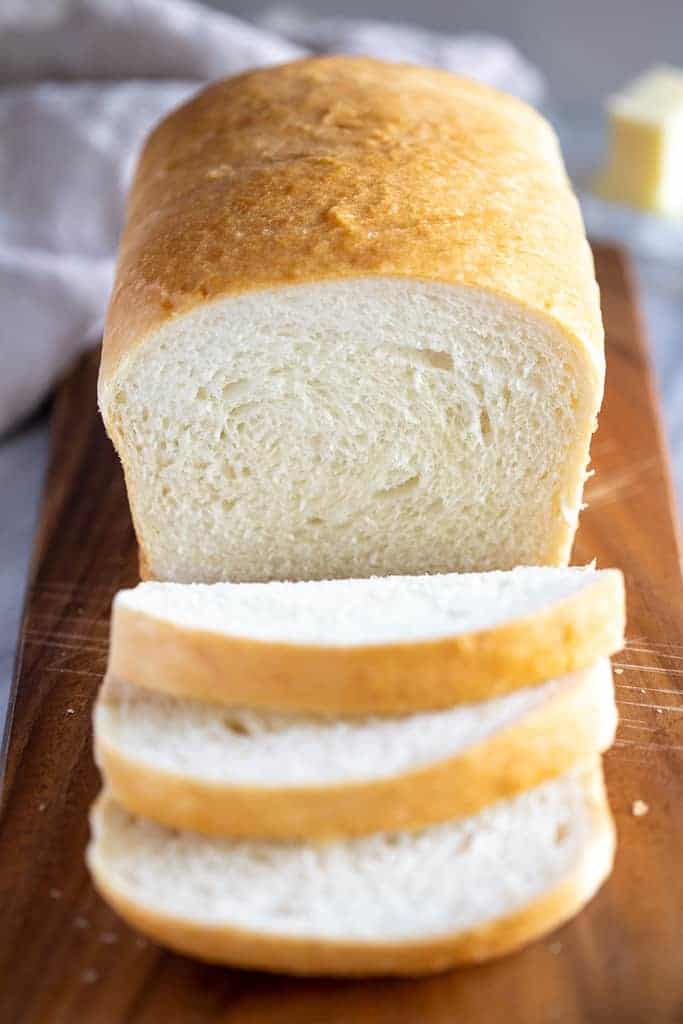
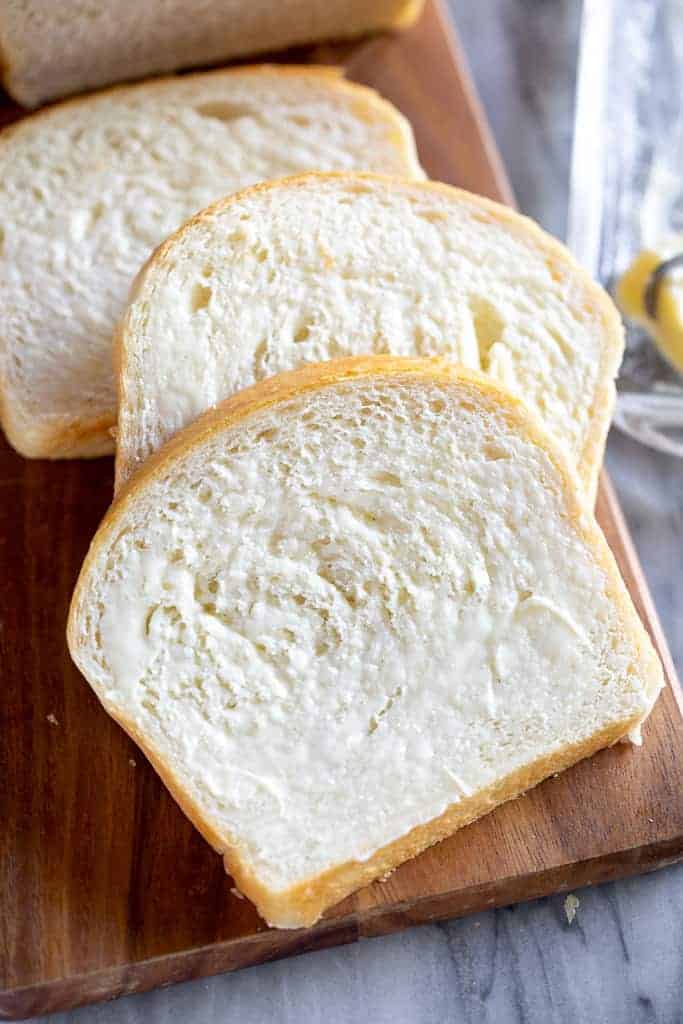
Look no further for the BEST and simplest homemade Bread recipe made with just six simple pantry ingredients! It's the perfect white bread for sandwiches and it freezes well too!
Our favorite way to eat freshly baked bread is with homemade strawberry, raspberry, or peach jam. It's simply heaven.
There are so many things to love about this bread recipe, but if I had to highlight the best parts, it's that it only requires shelf stable ingredients (no milk, eggs or butter needed!) and it's EASY and fool-proof to make! Whether you're a newbie or experienced bread maker, you can't mess this up, and I know you're going to love it! If you want another fool-proof bread recipe, try my homemade baguettes!
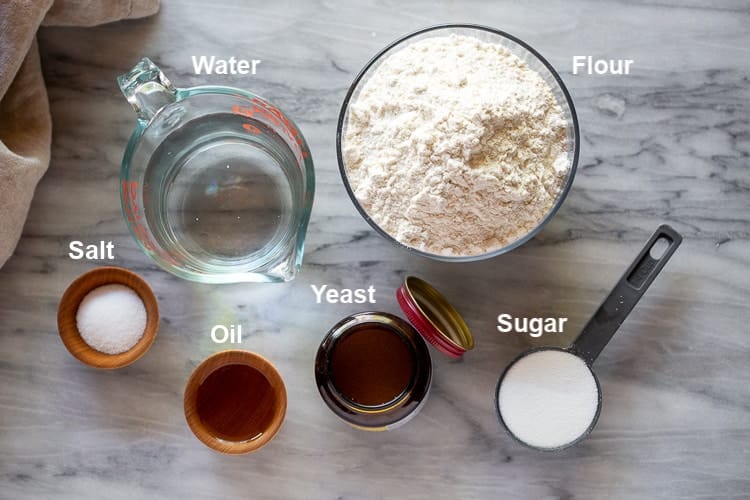
Ingredients needed:
- Warm water: (105-115 degrees)- to activate the yeast.
- Active Dry yeast: Instant or rapid rise yeast can be substituted, following my adaption notes in the recipe card.
- Granulated sugar or honey: the sugar is used to “feed” the yeast and tenderize the bread.
- Salt: to enhance flavor
- Oil: Vegetable or canola oil, or melted butter could be substituted
- Flour: Bread Flour or All-Purpose Flour can both be used with no changes to the recipe. The exact amount of flour used will vary depending on different factors (altitude/humidity etc.). What matters is the texture of the dough. It should be smooth and pull away from the sides of the bowl. It’s important not to add too much flour or your bread will be dense. The dough should be just slightly sticky when touched with a clean finger.
Pro Tips:
- Use fresh yeast! If your yeast is expired or bad, the bread will not rise properly. We will test it in step 1 of the recipe. Store yeast in the refrigerator to maintain best quality.
- To speed up the bread rise time: Make dough up to first rising, placing it in a well greased bowl, turning it once to grease the dough all over. Cover bowl with plastic wrap. Preheat oven to 180 degrees F, then turn oven off. Place bowl into the oven, leaving the oven door slightly cracked open. Allow to rise until doubled. Then remove, punch down and shape into loaves.
Do I need a Bread Maker or Stand Mixer?
NO! You don't need any special equipment for this white bread recipe. If you have a stand mixer it makes the process easier, but you can simply use a mixing bowl and wooden spoon, and then knead the dough with your hands. You can use bread machine with this recipe if you have one, but you may need to cut the recipe in half (to make just 1 loaf), depending on your machines capacity.
How to make Bread:
- Proof the yeast: In a large bowl or stand mixer add the yeast, water and a pinch of the sugar or honey. Allow to rest for 5-10 minutes until foaming and bubbly. (This is called “proofing” the yeast, to make sure it is active. If it doesn’t foam, the yeast is no good, and you need to start over with fresh yeast).
- Prepare the dough: Add remaining sugar or honey, salt, oil, and 3 cups of flour. Mix to combine. Add another cup of flour and mix to combine. With the mixer running add more flour, ½ cup at a time, until the dough begins to pull away from the sides of the bowl.
- Knead the dough: Mix the dough for 5 minutes on medium speed (or knead with your hands on a lightly floured surface, for 5-8 minutes). The dough should be smooth and elastic, and slightly stick to a clean finger, but not be overly sticky.
- First Rise: Grease a large bowl with oil or cooking spray and place the dough inside. Cover with a dish towel or plastic wrap and allow to rise in a warm place* until doubled in size (about 1 ½ hours).

5. Punch the dough down really well to remove air bubbles.
6. Divide into two equal portions. Shape each ball into long logs and place into greased loaf pans.
7. Second rise: Spray two pieces of plastic wrap with cooking spray and lay them gently over the pans. Allow dough to rise again for about 45 minutes to one hour, or until risen 1 inch above the loaf pans.
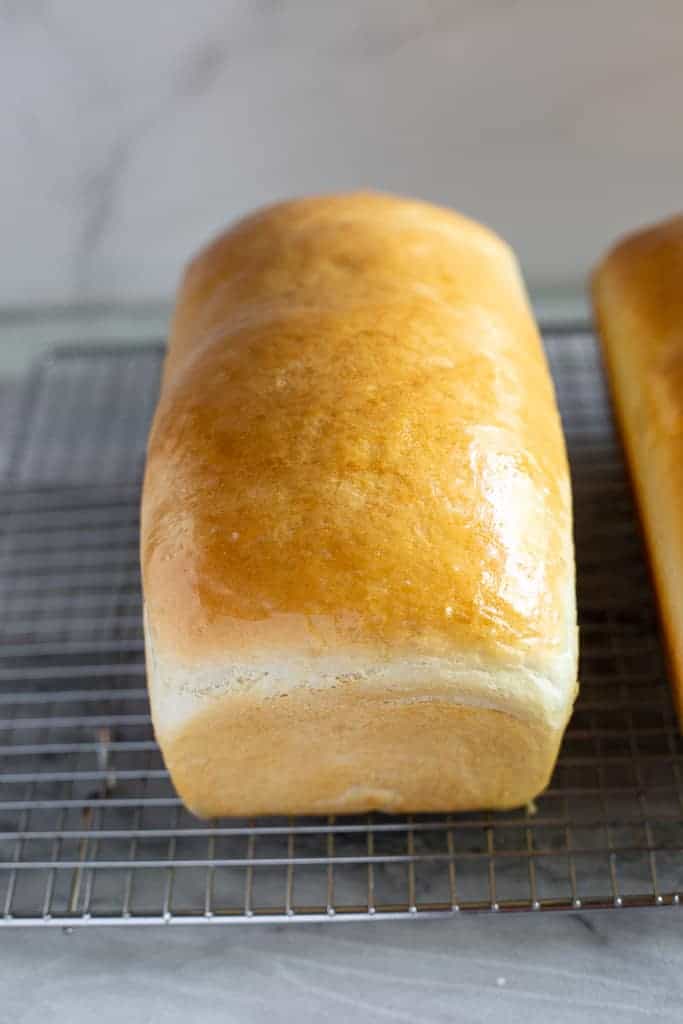
8.Bake: Adjust oven racks to lower/middle position. Preheat the oven to 350 F. Bake bread for about 30-33 minutes, or until golden brown on top. Give the top of a loaf a gentle tap; it should sound hollow.

Invert the baked loaves onto a wire cooling rack. Brush the tops with butter and allow to cool for at least 15 minutes before slicing.
Storing: Once cool, store bread in an airtight container or bag for 2-3 days at room temperature, or up to 5 days in the refrigerator.
Make Ahead And Freezing Instructions:
To make ahead: Make the bread dough through step 4, before the first rise. Place in a large airtight container, and refrigerate for up to one day. Remove from fridge and allow to come to room temperature. Proceed with punching down and forming loaves.
To freeze bread dough: Prepare the recipe through step (6), before the second rise. Place the shaped loaves into a freezer-safe or disposable aluminum bread pan. Cover tightly with a double layer of aluminum foil and freeze for up to 3 months. When ready to bake, allow the loaves to thaw and complete the second rise, at room temperature (about 5 hours). Bake as directed.
To freeze baked bread: Allow baked bread to cool completely. Place each loaf in a freezer-safe resealable bag and freeze for up to 3 months. Thaw at room temperature on the countertop, or overnight in the refrigerator.
Variations:
- Cinnamon swirl bread: After punching dough down and dividing into two pieces (step 7) roll each piece out into a large rectangle. Mix ¼ cup sugar and 2 teaspoons ground cinnamon together. Sprinkle the cinnamon sugar mixture on top, leaving a 1-inch border around the sides. Roll the dough up very tightly into a log. Pinch the ends to seal and place into prepared loaf pans, seam side down. Continue with step 8.
- Raisin Bread – Add 2 cups of raisins to the bread dough in step 3, then follow instructions above for adding cinnamon swirl.
- Rolls
- Breadsticks
- Whole Wheat Bread
- Artisan Bread
- Pizza Dough
 Uses for Leftover Bread:
Homemade bread will dry out after 2-3 days, but I have many recipes that use bread slices, including:
- Baked French Toast Casserole
- Bread Pudding
- Classic French Toast
- Bread Crumbs – Allow the bread to dry out completely, then pulse it into crumbs using a food processor or blender.
- Dried Bread Cubes for Stuffing
- Overnight Breakfast Casserole
You can also FOLLOW ME on FACEBOOK, TWITTER, INSTAGRAM and PINTEREST for more great recipes!

Homemade Bread
Equipment
Ingredients
- 2 cups warm water (105-115 degrees), (474g)
- 1 Tablespoons active dry yeast*
- 1/4 cup honey or sugar, (85g honey, 50g sugar)
- 2 teaspoons salt
- 2 Tablespoons oil (canola or vegetable), (30 ml)
- 4 - 5 1/2 cups all-purpose or bread flour*, (500g-688g)
Instructions
- Prepare the dough: In a large bowl or stand mixer add the yeast, water and a pinch of the sugar or honey. Allow to rest for 5-10 minutes until foaming and bubbly. (This is called “proofing” the yeast, to make sure it is active. If it doesn’t foam, the yeast is no good, and you need to start over with fresh yeast).
- Add remaining sugar or honey, salt, oil, and 3 cups of flour. Mix to combine.
- Add another cup of flour and mix to combine. With the mixer running add more flour, ½ cup at a time, until the dough begins to pull away from the sides of the bowl. The dough should be smooth and elastic, and slightly stick to a clean finger, but not be overly sticky. Add a little more flour, if needed.
- Knead the dough: Mix the dough for 4-5 minutes on medium speed (or knead with your hands on a lightly floured surface, for 5-8 minutes).
- First Rise: Grease a large bowl with oil or cooking spray and place the dough inside, turning to coat. Cover with a dish towel or plastic wrap and allow to rise in a warm place* until doubled in size, about 1 ½ hours.
- Spray two 9x5'' bread pans generously with cooking spray on all sides. (I also like to line the bottom of the pans with a small piece of parchment paper, but this is optional.)
- Punch the dough down well to remove air bubbles. Divide into two equal portions. Shape each ball into long logs and place into greased loaf pans.
- Second rise: Cover pans with a lightweight, dry dish towel (or spray two pieces of plastic wrap generously with cooking spray and lay them gently over the pans). Allow dough to rise again for about 45 minutes to one hour, or until risen about 1 inch above the loaf pans. Gently removing covering.
- Bake: Preheat oven to 350 F. Bake bread for about 30-33 minutes, or until golden brown on top. Give the top of a loaf a gentle tap; it should sound hollow.
- Invert the loaves onto a wire cooling rack. Brush the tops with butter and allow to cool for at least 10 minutes before slicing.
- Once cool, store in an airtight container or bag for 2-3 days at room temperature, or up to 5 days in the refrigerator.
Notes
To freeze the dough: Prepare the recipe through step (6), before the second rise. Place the shaped loaves into a freezer-safe or disposable aluminum bread pan. Cover tightly with a double layer of aluminum foil and freeze for up to 3 months. When ready to bake, allow the loaves to thaw and complete the second rise, at room temperature (about 5 hours). Bake as directed.
To freeze baked bread: Allow baked bread to cool completely. Place each loaf in a freezer-safe resealable bag and freeze for up to 3 months. Thaw at room temperature on the countertop, or overnight in the refrigerator. Bread Machine: If using a bread machine, you may want to cut this recipe in half to make 1 loaf (depending on the capacity of your machine).
Nutrition
Nutrition information is automatically calculated, so should only be used as an approximation.
Text me new recipe ideas!
Simple, tasty ideas sent once a week. No spam.
Have you tried this recipe?!
RATE and COMMENT below! I would love to hear your experience.


This recipe is AMAZING!!!! Where I grew up, we had a restaurant called “Quincys” and they had the most delicious rolls that they would bring to the table when you sat down (think Texas Roadhouse rolls but even better). This bread reminds me so much of that bread! I used butter instead of the oil and oh my, it’s was delicious!
Added butter instead of oil this time really excited to see how it turns out
I make ghee…clarified butter, and use that…OMG!!!😜
Clarified butter is not ghee. They are two different products.
A suggestion. Mix all ingredients for about 2 minutes than set your bread machine with a delay. This will allow the Yeast to work better as it will be mixed all the way through the bread dough.
How much unmelted butter for one loaf? Thanks
I was just going to ask this question thank you!
Yes Quincy’s was the best roll ever!
We used to go to Quincy’s for the rolls and salads when I was younger. My parents loved the steaks.
Did you sub 1:1 amount of butter? Cold, room temp, melted?
This recipe was phenomenal! Fluffy and pure! I was able to make 1 nice loaf of home made bread for my fiance! He absolutely loved it! Thank you!!!!
Did you just half the recipe?
I just halved the recipe today but my second rise wasn’t as high as I would have liked and didn’t get above my 9×5 USA loaf pan. I would try half plus 25 percent for one (one pound) loaf pan. I just ordered a 1.5 pound loaf pan and I may try the full recipe in that for a larger loaf. The bread tastes AMAZING though and looks great, just a tad short.
Easy and Absolutely Deliciously Perfect Bread!
I love the simple ingredients and the simplistic steps! Just copied it into one of my recipe books so I won’t lose it!
This recipe is the best white bread ever!!! Thank you!!
After making lost of different internet bread recipes, I make this recipe over and over and over and over and over again – each time it is spot on and delicious
Do you think this could beade without a loaf pan? Like a round version?
I just shaped it into a rope and it worked just fine. So i guess it’ll be okay in a round shape.
I use my Dutch Ovens all the time for this recipe. Works wonderfully!
Did you use the recipe as is or make less for a round loaf.
This is the first time I have ever commented on a recipe. This is the best bread I have made and I have been making ready for over 10 years. Wow!
If I could give it 10 stars⭐⭐⭐⭐⭐⭐⭐⭐⭐⭐ I would! Found this page thru a Google search. We ran out of bread and thought I’d make some. I’ve used other bread recipes that are long and cumbersome but this one is so easy I make 2 loaves every other day. Haven’t bought store bread in weeks. Thank you!!!
Been using your recipe for 2 years now and it never fails. Ive used it for cinnamon rolls, dinner rolls, focaccia… MAN hits every time
Do you do anything different to use it as dinner rolls?
How do you make cinnamon rolls?
Uummm cinnamon rolls!!!
What did you do different for cinnamon rolls?
I read that using self rising flour is good for biscuits, rolls, etc. not sure about focaccia bread though
Maybe just after first rise pat it down roll it out to a flat square/rectangle and chunks of butter and a mix of melted butter sugar and cinammon. Then roll the rectangal into a loaf and cut 1-2inches width wise along the roll to get circle shapes. Let them rise and bake probably less time. Then add frosting. Never made them but ive seen my neighbor do it once.
Just a guess! Also made krokenbaulers once like cinamon bread desert with cardamon which may be a good addition.
I’m new to making my own bread. I’ve tried so many recipes hoping for the go-to every day bread recipe and THIS is it!!! My bread came out so soft. Shelf stable ingredients make this super accessible. Don’t be afraid of a bit of stick with the dough either because too much flour will make it dense. Honestly, so yummy, light and fluffy. Thank you so much for finally giving me a recipe that yielded what it said it would, delicious, soft, made from scratch bead.
How much flour did you end up using?
This is the best recipe for bread I have found on the internet. I made two loaves, and put cinnamon/sugar in one. So freaking good. I used avocado oil and honey, Red Star yeast. I will stick with this recipe for my now-weekly bread baking chore.
So many recipes available in these blogs or websites are disappointing, but not this one! It’s a keeper.
How much cinnamon and sugar did you add and at which step?
Did you use the same amount of the avocado oil that the recipe calls for in oil? Curious if the avocado oil changed the flavor. I want to use it instead of seed oils.
I only use avocado, and switched it 1:1. No change in taste IMO, however I dont know what else it would taste like. Its wonderful!
Can you use extra virgin olive oil?
I did. So good!
I did and it came out well!
Next time I’m using melted butter! I think everything is better with butter.
I use the same amount. Avocado oil is way better to use
Yes you can and just same amount of this with avocado oil. I just use it.
The cinnamon/sugar addition sounds really good. Did you replace the amount of regular sugar in the recipe with the same amount of cinnamon/sugar or did you add as an addition somehow? Thank you!
I rolled out the dough after the 1st rise and then put a layer of butter, sugar and cinnamon on it then rolled it up and put it in a loaf pan for the 2nd rise…had the most beautiful and tasty swirl of cinnamon and sugar!
I just did this today. Seriously so good!
Just add some extra sugar and cinnamon. Roll out and don’t put to edges. I leave about an inch or lil over from the edges. You can even rub some melted not really hot butter for it to stick to.
Can you substitute the oil for butter??
I’ve subbed the oil for butter 1:1 and it turned out good! It seemed a little more crumbly .. i haven’t tried any other quantities of butter.
Was it melted or no?
The cinnamon and sugar one–good also with raisins and’or craisins added in with the cinnamon/sugar loaf. SO tasty!
So I’ve been wanting to make my own bread for a while. Finally said screw it and picked a recipe that I had everything for.
First off the house smelt amazing, the wife already wanted to make the cinnamon variant before the regulars were done cooling.
Bread was as tasty as I hope it would be. And will be making this instead of buying bread from now on 10/10
This recipes is so good. I literally make it every week!! Have you ever made this with whole wheat flour?
There is a whole wheat bread link under the ingredients and instructions. Here it is.
https://tastesbetterfromscratch.com/honey-whole-wheat-bread/
Ma’am, I think I might be in love with you. This is the best bread I’ve ever made, and with shelf stable ingredients WHAT?! I will never make a different loaf, I promise.
LAUREN! GIRL!! I have been baking with your bread recipe for about a month now. I bake 2 loaves every 2-3 days. It’s dry & freezing here in VT currently … & this recipe comes out absolutely perfect every single time! As I see others have done — I also have it memorized.
Your tips & tricks helped perfect this loaf as well.
One thing, if anyone is interested, is so important. DON’T BE AFRAID OF MOIST DOUGH. Seriously, add *just enough* flour to pass the fineger test.
I take my dough out of the mixer after it’s fully clinging to the hook, but if it settles a second, it sticks to the sides as I nurture it up & out & over into the rising bowl. I use about 4 & 1/4 to 1/2 cups flour, total.
If anyone else is in freezing, dry area — the warm oven is so key for a good rise. First rise I cover bowl with hot water dampened cloth. Second rinse I loosely cover loaves with plastic wrap, then place that freshly hot water dampened cloth on the bottom rack of the oven.
I weigh my dough when splitting for the second rise.
My oven — unbelievably even to me!! Takes only 15 minutes at 350 to bake both loaves to just pass a perfect knock test, & the loaves turns out deliciously chewy with an amazing flavor.
Anyway — THANKS, LAUREN! Your recipe is already in the “pass down” box! Appreciate the perfection! 🙂
Made this today and WOW!! Amazing taste and texture. So easy to put together and hassle free. I’ll be making a lot of this bread.
Honestly, I’m a little upset. I made this recipe exactly as it is written, and now my family insists that I make bread ALL THE TIME. What have I done?!?!?
That’s hilarious 😂
I made it one time and now my husband wants it all the time.
I’ve had to make this recipe again and again, ever since I tried it the first time. My son wants no other bread after trying this!
I can’t stop making this bread either. It’s so much healthier than store bought and you can tell. Light and fluffy. I gave some away to family (because that’s how I was raised) and now my family is requesting more. Lol
This is a great and simple homemade bread recipe. I am a chef and like to try new recipes, and this recipe is in my top 5 best recipes I have tried for homemade bread.
One of the absolute best recipes I’ve seen for homemade Bread. Turned out absolutely perfect and world’s better than any store bought bread.
Omg!!! This recipe have me feeling like I can bake anything. Thank you so much
Nice I think this recipe is good for baking bread hope everyone will enjoy it and I can tell those who want to learn more should join
Wow!!!!!!! Ten minutes after they cooled my family devoured one loaf I absolutely love this recipe.
Just made this and WOW!! Delicious!! I tried many bread recipes and this IS the best one I found. I mad 2 loaves and already I ate 3 slices! Lol
Also this recipe enables you to make yeast rolls and raisin bread which I will be making next. Thank you SO much for the recipe.
How do you make into rolls?
I’m thinking just make them into balls when you do the 2nd rise, Probably only 15-20 minutes in the oven? Then brush them with butter once out of the oven like the recipe says. Ima have to try that now 😩😂
Can I use both bread flour and wheat flour? How does the recipe change if I do? I started making one with both before I read the notes, using 3 cups of bread flour and 2.5 cups of whole wheat, so I will respond to my comment with the results.
You can definitely use a mix, just know whole wheat absorbs more liquid so the dough may need a bit more water and will be slightly denser. We haven’t tested it that way, but I can’t wait to hear how yours turns out!
I have some milk to use up. Can I sub the water for milk? Or at least part of it?
Yep, you can swap in milk, but I’d do it only partially. Try replacing up to half the water with milk (so 1 cup milk + 1 cup warm water). Full milk can make the dough rise a little slower and the bread a bit heavier since milk adds extra sugar/protein.
It’s fluffy and delicious. But I cannot get a good rise out of anything. I live in Anchorage, my kitchen’s in the 60s. I’ve tried the preheated-door open oven trick, warmed microwave, dough bowl is always sealed with plastic wrap, sometimes towel. Who else is baking yeast bread in Anchorage, AK? I need some tips! Great recipe, fault of the baker not the recipe…
Very good and simple recipe. I have froze the dough before the first rise and that worked very well too to make a large batch to have fresh bread all week. The only change I made was I use avocado oil instead of vegetable/canola oil.
This recipe is fantastic. Perfectly replicates the softness and sweetness of grocery store bread without all the garbage. It toasts great for grilled cheese or works great for a deli sandwich or PB&J. Amazing.