This post contains affiliate links.
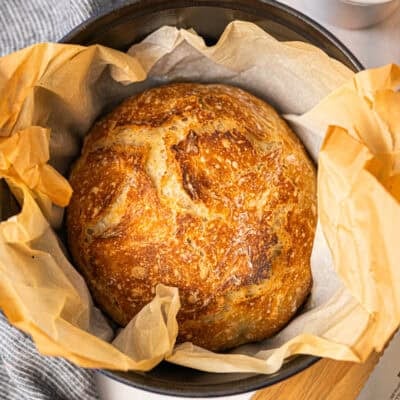
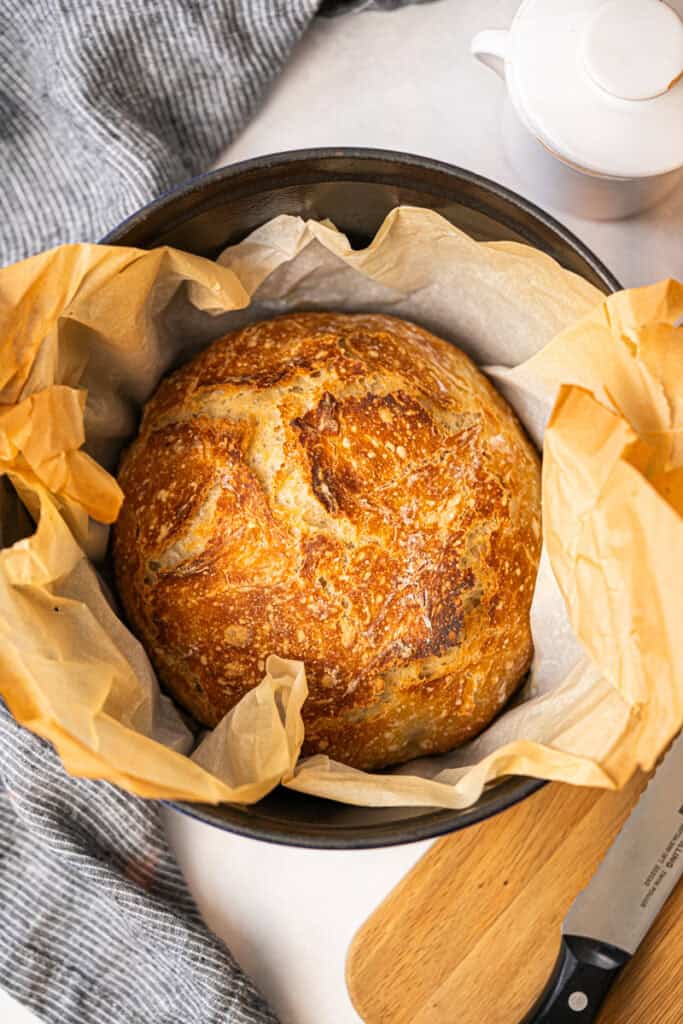
Our easy No Knead Artisan Bread recipe just uses 4 simple ingredients and creates a bakery-style artisan loaf with a crispy, golden crust and a soft, tender interior. This is the easiest bread that just requires 5 minutes of prep, anyone can make it!

I'm telling you, ANYONE can make this Artisan Bread.

This is hands-down the easiest bread recipe you'll ever make, and it looks like it came straight from a fancy bakery! You only need 4 basic ingredients–flour, yeast, salt, water–and 5 minutes of time. If you're too intimadated for sour dough (or frankly just don't have the time for sourdough) this will be your favorite artisan bread recipe.
Artisan bread bakes best in a cast iron pot (this one is a great price) but you can also make it on a basic cookie sheet, with a pan of boiling water at the bottom of your oven to create steam. I love to serve it alongside soup, salads, or really any main dish!
If you want more easy bread recipes, try my Homemade Baguettes, English Muffins, Homemade Sandwich Bread, Pita Bread, or Focaccia!
How to make No Knead Bread:
Combine and Rise: In a large mixing bowl, mix flour, salt, and yeast. Pour in the warm water and stir with a dough hook or wooden spoon until combined (the dough will be sticky). Cover the bowl and let it rise for 3-4 hours or in the refrigerator for up to 15 hours.
Shape and Preheat Pot: On a floured surface, shape the dough into a bowl then place on a piece of parchment paper. Cover with a dry kitchen towel allow it to rise for 30 minutes. Place your empty dutch oven (or baking sheet, and a pan of hot water) in the oven and let it preheat to 450°F.
Bake: Uncover dough and carefully lift the parchment paper with the bread dough on it, into the hot dutch oven. Place the lid back on the pot and bake for 30 minutes. Remove the lid and bake uncovered for 15 more minutes. Remove the bread from the pot and let it cool on a wire cooling rack.

No Knead Bread
Equipment
- Dutch Oven , or
- Dough Hook , or wooden spoon
Ingredients
- 3 cups all-purpose flour
- 2 teaspoons coarse sea salt
- 1/2 teaspoon active dry yeast, (or instant yeast)
- 1 ½ cups warm water, (about 110 degrees F)
Instructions
- In a large mixing bowl, combine flour, salt and yeast. Pour in warm water and stir with a wooden spoon until well combined. The dough will be sticky. Cover the bowl and allow it to rise at room temperature for 3-4 hours, or in the refrigerator for up to 15 hours.3 cups all-purpose flour, 2 teaspoons coarse sea salt, ½ teaspoon active dry yeast, 1 ½ cups warm water
- Scoop dough onto a floured work surface and shape into a ball. Sprinkle a tiny bit of flour on top of the dough ball and place it on a piece of parchment paper. Cover the dough with a dry kitchen towel. Allow to rise for 30 minutes. At this point you can score the bread with a bread lame, if you want, but it's not required.
- Meanwhile, place an empty dutch oven/cast iron pot*, with the lid on, into the oven and preheat oven to 450 degrees F.
- Uncover dough and lift the parchment paper, with the dough on it, into your hot pan that’s been preheating in the oven. Cover with lid and return to oven to bake for 30 minutes.
- After 30 minutes, remove lid and bake, uncovered for about 15 more minutes, until golden on top. Remove from oven and allow bread to cool on a wire cooling rack.
- Store bread in an open paper bag on the counter for up to 1 week.
Notes
- 3 large cloves minced garlic plus 2 Tablespoons fresh chopped rosemary,
- 1 cup favorite kind of shredded cheese (try adding a chopped jalapeño!)
- ¾ cup dried cranberries and/or chopped nuts.
Nutrition
Nutrition information is automatically calculated, so should only be used as an approximation.
Text me new recipe ideas!
Simple, tasty ideas sent once a week. No spam.
I originally shared this recipe March 2019. Updated January 2026.


Amazing recipe. Came out perfect!
I use this recipe all the time. I love that it’s nearly no work, but makes boring dinners feeling fancy. I will often do a double recipe (I have 2 Dutch ovens) started the night before or morning of, pop in the fridge once I make the dough and take out of the fridge a couple hours before I want to bake.
turns out great every time and is so easy it feels wrong.
Loved this bread. I did it the sheet pan way, because my cast iron dutch oven was cooking your beef stew lol. I do think I will make this earlier in the day next time in the dutch oven. It was my first time ever making bread without a machine and though it wasn’t perfect, it was very delicious and I learned! Will try this with half wheat next time!
I had done the rising method of doing it in the fridge for 15 hours because I was short on time. And here I am next day and it looks like the dough hasn’t risen at all. Do I give it time to rise at room temp?
Yes, I’d give it some time at room temp. The fridge rise is usually more subtle, so it may not look like it’s done much overnight. After shaping, let it rest covered for 30 to 45 minutes at room temp before baking, a little longer if your kitchen is cool.
Can I bake this in my loaf pan since I don’t have a Dutch oven
We haven’t tested it in a loaf pan, but it should work. The shape and crust may be a little different, and covering it loosely with foil at first can help trap steam.
Is 1/2 (half) tsp yeast enough? All around I see other recipes for artisan bread asking for 2tsp. I started with the half but got scared it wouldn’t rise so I just added another 1tsp to equal 1-1/2 tsp yeast.
Yes, that small amount is correct for no-knead bread since it has a longer rise time, so no need to add more