This easy Pie Crust recipe is made with only 4 pantry ingredients and takes 20 minutes to prep! It's flaky, buttery, and elevates every single pie! You'll never buy store-bought pie crust again!
Homemade pie crust always tastes better! Make sure to try Graham Cracker Pie Crust and Oreo Pie Crust.

 Anyone can master our easy homemade pie crust!
If you're taking the time to make any sort of pie, you really owe it to yourself to pair it with a homemade crust. Store-bought crusts are bland, dry, and overcook quickly for many baked pies (like apple pie or pumpkin pie), plus it's so EASY to make homemade pie dough. The taste is incomparable. My secret is using both butter and shortening, since they have different melting points. The shortening provides stability and tenderness while the butter gives it the yummy buttery flavor we want.
This recipe makes enough for 2 crusts , in case you need a top and bottom crust. You can freeze the second crust for months, if not using it right away.
How to make Pie Crust:
Combine: Whisk flour and salt in a mixing bowl. Cut the cold shortening into small pieces, grate the frozen butter into the bowl. Use a pastry blender or forks to cut the fats into the flour until the mixture looks like coarse crumbs.

Add Water: Add a Tablespoon of ice water at a time, mixing it in until the dough starts to come together in a ball. You might not need all of it. Form into a ball then divide in half and shape each half into a flattened disc. Wrap each disc in plastic wrap and refrigerate for at least 2 hours or up to 24 hours. The disc can also be frozen for up to 3 months. Refrigeration is mandatory as you need the fats in the pie dough to be cold when it enters the oven, to yield tender, flakey layers.

Roll Out Pie Crust: Roll out crust on a lightly floured countertop. Or, if you're new to pie making, you could dampen a thin hand towel and lay it on the countertop. Place a large piece of parchment paper over it. (The towel will help keep the parchment paper in place while you roll out the dough, and you can use the parchment paper to easily flip the crust into your pie dish). Lightly dust with flour, then roll out cold pie dough into a large circle.Start at the center and work outwards, it should be thin and at least 1-2 inches larger than your pie plate.

Transfer to Dish: Carefully lift the crust by placing a hand underneath the parchment paper. Gently flip the crust, guiding it into the pie pan. Guide the crust into the bottom and sides of the pan, then carefully peel off parchment paper. Use kitchen scissors to trim excess overhanging crust, so that 1 inch hangs over the edges. Fold the crust behind the outer edges to create a thicker border around the pie, then crimp or flute the edges, if desired.

For Pies requiring an unbaked pie crust (like pumpkin, apple, or even chicken pot pie): Fill the unbaked crust with pie filling and Bake according to recipe instructions.
For Pies requiring a Baked Pie Crust (like lemon cream, german chocolate or coconut cream), pre-bake this flaky pie crust, called blind baking. To blind bake a pie crust, you need pie weights, or use dry beans or dry rice. (Without pie weights the crust will shrink into the pan as it bakes). Place a large piece of parchment paper inside the homemade pie shell then pour the pie weights, dry beans, or rice into an even layer on top. Bake at 375° F for 15-20 minutes. Remove pie weights by carefully lifting up on parchment paper. Prick the bottom of the pie crust with a fork, then return to oven for 10-15 minutes, until lightly golden.

Freezing Instructions:
To Freeze Pie Dough: Wrap the pie dough discs tightly in plastic wrap and place in a freezer safe container and freeze for up to 3 months. Thaw completely in the refrigerator before rolling out.
To Freeze Blind-Baked Pie Crust: Allow the crust to cool completely, then cover well with plastic wrap and aluminum foil and freeze for up to 3 months. Thaw completely at room temperature before filling.
Use Pie Crust for:
- Coconut Cream Pie
- Apple Pie
- Cherry Pie
- Blueberry Pie
- Pecan Pie
- Pumpkin Pie
- Lemon Cream Pie
- Chess Pie
- Quiche Lorraine, Spinach and Bacon Quiche, Broccoli Cheese Quiche
- Savory Pies: Tomato Pie, Chicken Pot Pie, or Garden Vegetable Pie
Follow me for more great recipes
Recipe

Pie Crust
Ingredients
- 2 1/2 cups all-purpose flour
- 1 teaspoon kosher salt
- 6 Tablespoons cold unsalted butter
- 3/4 cup vegetable shortening , chilled
- 1/2 cup ice water
Instructions
- Mix flour and salt in a large mixing bowl. Add ice cubes to a measuring cup and fill with ½ cup cold water. Set aside.
- Add fats: Grate frozen butter into the bowl, or cut it into very small pieces. Add chilled shortening and use a pastry blender or fork to cut the fats into the flour until well combined and resembles coarse crumbs.
- Add ice water a spoonful at a time, mixing until the dough begins to come together into a ball. Be careful not to over mix, and you may not need all of the water. Gently mold the dough into a ball.
- Divide dough into 2 pieces and press each to flatten into a disk.
- Refrigerate: Cover dough discs with plastic wrap and refrigerate the dough for 2 hours (or freeze for 30 minutes). Refrigeration is mandatory as you need the fats in the pie dough to be cold when it's rolled out and placed in oven).
- Roll out dough on a floured countertop. If you're new to pie making, it may be helpful to use this method: dampen a large cloth and lay it flat on your countertop, with a large piece of parchment paper over it (the damp towel will keep the parchment from moving). Lightly flour the parchment and dough and roll the dough into a large circle, about 1-inch larger then the diameter of your pie dish. Always start at the center of the crust, and roll outwards.
- Place in pie pan: Gently turn the dough into your pie dish and remove the parchment paper. Settle it smoothly into the bottom and sides of the pan. Trim and crimp the edges of the crust.
- For Pies requiring an unbaked pie crust (like pumpkin, apple, or even chicken pot pie): Fill the unbaked crust with pie filling and bake according to pie recipe instructions.
- For a blind Baked Pie Crust (pre-baked crust) you need pie weights, dry beans or dry rice. (Without pie weights the crust will shrink into the pan as it bakes). Place a large piece of parchment paper over the unbaked crust and add pie weights, (or 1-2 cups dry beans, or dry rice) on top. Bake at 375° F for 15-20 minutes. Remove pie weights by carefully lifting up on parchment paper. Prick the bottom of the pie crust with a fork, then return to oven for 10-15 minutes, until lightly golden. Allow crust to cool before adding filling.
Notes
Nutrition
Follow Me
UPDATED November 2016, March 2018 and November 2022 and October 2024.
This post contains affiliate links.

 Anyone can master our easy homemade pie crust!


I use this recipe every time I make a pot pie or dessert and it has never failed me. If you are looking for a good crust recipe, this is the best imo. Flakey, tastes absolutely stellar.
I’m usually a box mix pie crust girl but decides to try this recipe. I’m so glad I did! It was super easy to follow. I ended up using my food processor instead of doing it by hand and it still worked perfectly! The crust was light and flaky and delicious!
The texture is great – it definitely delivers on light and flaky. But the 2 to 1 ratio of crisco to butter makes it kind of flavorless and it leaves that kind of film in my mouth I always get from hydrogenated oils. Perhaps I could find a more flavorful substitute for the shortening, or even out the ratio next time I try.
Follow up to my 1st review. Pie came out of oven really bad. Bottom crust crumbled. With all the good reviews I figured something had to go wrong. So I went back and went over how we did everything. Turns out that the crisco was measured wrong. Too much was used and that’s why it was so soft and did not set. Will try again. Thanks
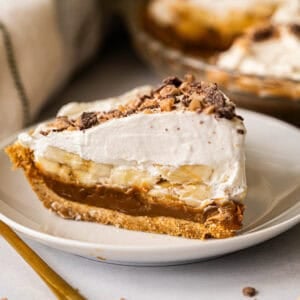
Turned out amazing! Delicious and flakey. I made banana cream pie and chocolate silk pie with the crust. The recipe was great
Ok… I’ve made this recipe many times now. It is literally perfect. Lauren has updated the recipe with so many great tips to make pie crust making so easy. The roll out technique – the best!!! Loved the video. I was giddy and so grateful (and wishing I had this recipe years ago) as I was rolling out the crusts for the TBFS pecan pies for our Thanksgiving feast.
I have my usual go to pie crust recipe. But I like to try different ones. I did not like this recipe at all. I followed all directions and the dough was to soft. It kept cracking and I could not pick up the crust with my rolling pin like I usually do. I had to use parchment paper. It did not want to hold its shape on my edges. I popped the dough in the freezer before I filled it while the stove heated to temperature. I put foil around edges to keep from getting to dark. Near the end of baking I went to take off the foil and found that 1/4 of the edging fell off.
So yummy! I was surprised how easy it was to roll out even after resting in the freezer for an hour. Light and delicate with flaky layers. It was perfect for my quiche and apple pie.
See my post @cbear9264 for pictures and November recipe challenge.
Hi there! So glad I found your page. I just made this on Sunday as a trial run for Thursday. I made enough for two. I used one for the trial pie, which was gone in 5 minutes. My friends loved it! But do I need to toss that second disc? It’s already Thursday tomorrow and I’m new to this baking ordeal so I do not know the rules to save or throw out. I am recently finding out some can only be saved for up to two days. Is it too late? It’ll be 4 days tomorrow…. Thank you!
I was excited to try this, as it had some differences from the pie crust recipe I usually use… I’ve never refrigerated crisco, grated butter into it, used ice water, or refrigerated the crust before rolling it.
The instructions were very easy to follow, and it worked out nicely. The parchment paper was extremely helpful because I usually break the crust as I’m putting it in the pie plate.
I used this crust for a pumpkin pie and a cherry pie. Both turned out well and were delicious! I will definitely use this recipe again!
I made these for the November challenge…took pictures, but I don’t see anywhere here to include them.
Wow, it’s so awesome to hear how well the pie crust recipe worked out for you! 😊 Grating butter and using ice water can really make a difference, right? And parchment paper is a game-changer for sure.
I’m super curious to see how your pumpkin and cherry pies turned out. It’s great that you took pictures! Could you please send them over to us at admin@tastesbetterfromscratch.com? We’re really excited to check them out and maybe even feature them! Thanks for diving into the November challenge and sharing your experience. Can’t wait to see your delicious pies!
I had a little bit of difficulty with this recipe. The dough came together very quickly once I started adding water so I did not even use half of the water that the recipe called for, but when I tried to roll the dough out after chilling, it seemed like the dough was quick to crack, especially when I tried to transfer it to the pan. May just be my fault for not adding enough water at the beginning!
I had the exact same problem