
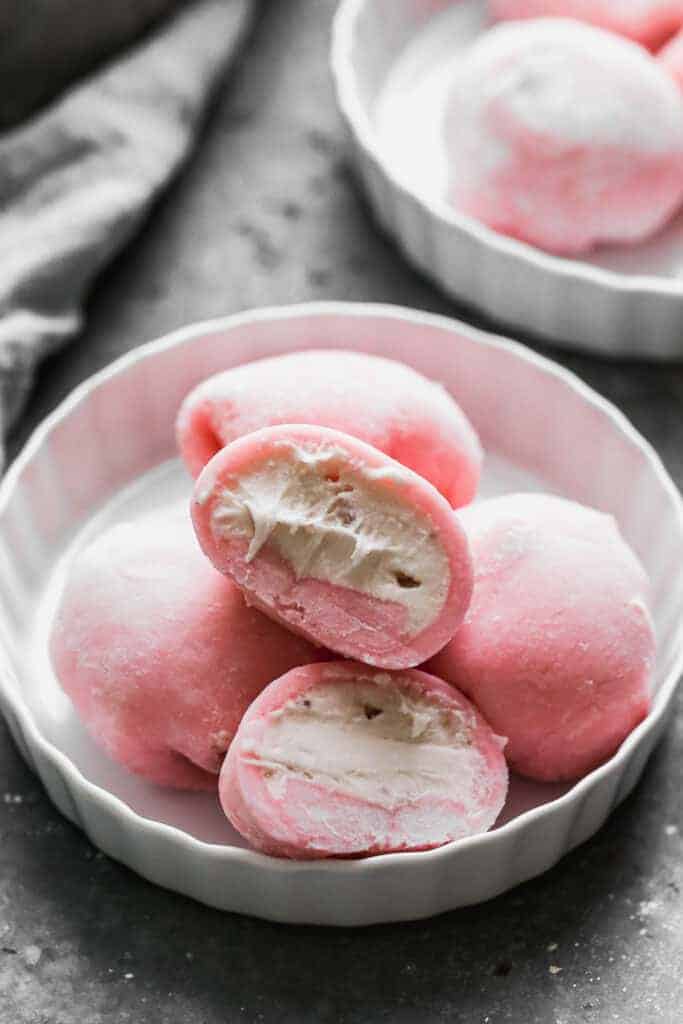
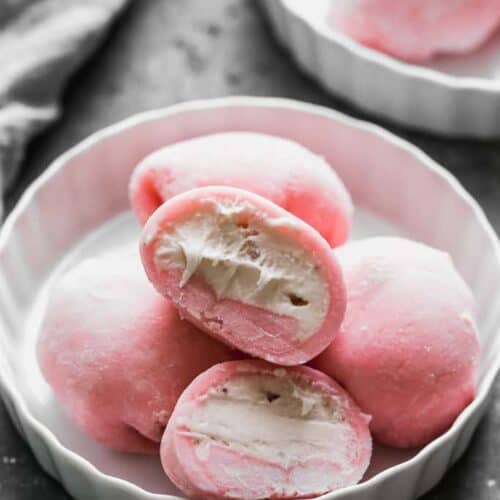
Homemade Mochi Ice Cream are Japanese rice cakes with an ice cream center in a soft, slightly chewy, sweet rice dough. You won’t believe how easy it is to make yourself!
My love affair with Mochi (pronounced moh chee) began a couple years ago when a friend from Laos brought mochi ice cream to a dinner party. I loved the soft and chewy texture and the size and shape of this bite sized treat. Since then, I’ve noticed as mochi has made major gains in popularity in the US and I see it in the freezer section of every grocery store I enter.
My kids have also become big fans of mochi ice cream as we’ve been purchasing large packs from Costco and having them nightly for dessert. But, as much as I love the my/mo variety pack, I decided it was time to try my hand at the homemade version. And, as predicted, I’ll never go back!
Some people recommend making mochi rice cakes even sweeter with a 2:1 ratio of sugar to flour. For that approach, check out this recipe.
What is mochi?
Mochi is a sweet rice cake that is found in many different sweet or savory varieties in Japanese cuisine. During the Japanese New Year, there is a tradition called Mochitsuki, which is the more laborious process of steaming the sweet glutinous rice and then pounding it to make mochi (small glutinous rice cakes). I loved this video showing the process of Mochitsuki.
This recipe is a simpler version of mochi is made by microwaving or oven steaming the glutinous rice flour to form these little rice cakes.
Why we love to make our own Mochi Ice Cream:
- EASY! It may sound intimidating, but I’m here to tell you this recipe is so EASY! Pick up your favorite ice cream and order sweet rice flour (amazon will ship it right to your door for $7) and the other 5 ingredients are pantry staples. Plus, it takes 3 minutes to cook and just about 25 minutes to prepare.
- Customize it. I love all the customizations you can do to this recipe (see flavor ideas below). I added peanut butter to my most recent batch of dough and it was amazing.
Know before you go:
Mochi is very sticky! You will want to have cornstarch, potato starch, or tapioca flour on hand to help manage the stickiness. You’ll also want to have some water in a cup to dip your spatula in and be ready to soak everything in water when you are finished. This will help make easy cleanup.
Dough Cutter: Choose a cookie or biscuit cutter that is about an inch bigger than the ice cream scoop. It’s important to have a circle of dough that is just big enough to surround the ice cream but not SO big that you have air pockets or extra dough hanging off. I’ve even used the lid of my cornstarch container because it was just the right size. If you do have extra dough, be sure to cut it away when you add the ice cream as it will taste hard and chewy once it’s frozen.
Cooking the mochi dough: I have found the microwave to be fast, easy, and effective. However, traditional mochi is steamed. If you’d like to steam the dough instead, steam it for for 15 minutes, stir it and steam for 5 more minutes or until the dough takes on a slightly shiny sheen.
Ingredients in Mochi:
- Glutinous rice flour (sweet rice flour- I used Mochiko but you can also use shiratamako). Regular flour will not work for this recipe!
- Water
- Sugar
- Powdered sugar
- Cornstarch (or potato starch) – to help with the stickiness of the dough.
How to Make Mochi:
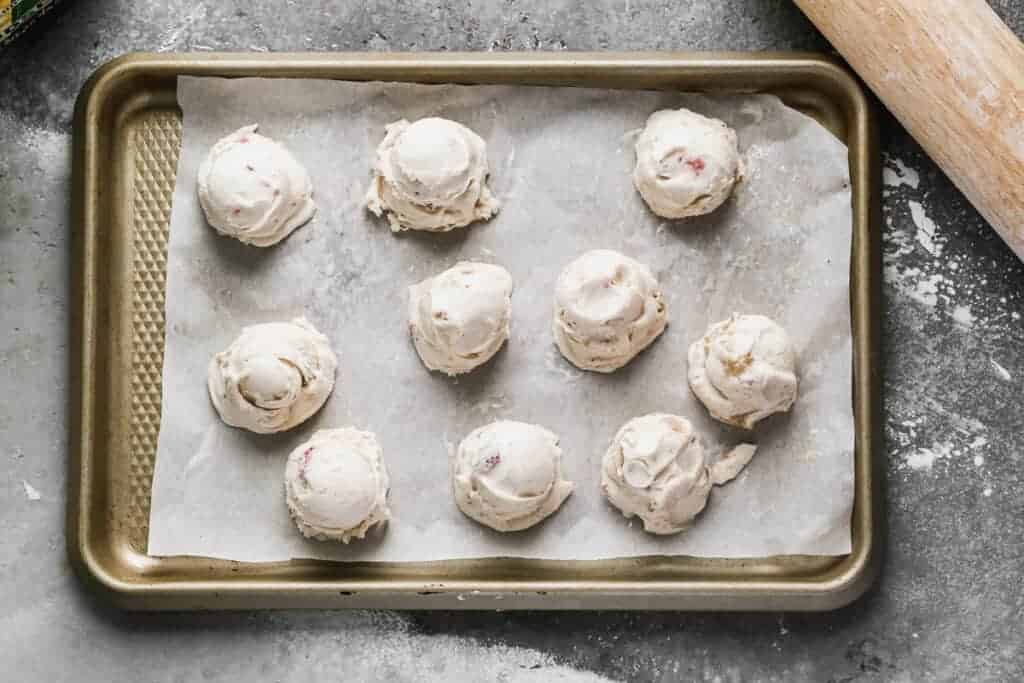
1. Freeze ice cream balls: Place a piece of parchment paper on a cookie sheet. Working quickly, use a small ice cream scoop to scoop ice cream balls and place them on the parchment paper. Be sure to pack the ice cream tightly in the scooper, leaving a flat edge on the ice cream so that it will sit flat on your cookie sheet. Freeze for 1 hour.
 2. Make mochi: Combine flour, sugar, and powdered sugar in a microwave safe bowl. Add water and stir well, until smooth. Cover the bowl with plastic wrap and microwave mochi dough for 1 minute. Wet your spatula to prevent sticking and use your spatula to repeatedly fold the mixture. Cover, and microwave again for 1 minute. Fold the dough again and microwave for 30 more seconds. The mochi should look slightly shiny and if it doesn’t, microwave for 30 more seconds.
4. Roll mochi dough into rectangle: Place a piece of parchment paper on the counter and dust it with a layer of cornstarch. Use a rubber spatula to scrape the mochi dough from the bowl and onto the parchment paper (keep in mind that it will be very hot so be careful not to touch it). Dust the top of the dough ball with cornstarch. Use a rolling pin to roll the mochi dough into a large rectangle, about ¼ inch thick. If the dough sticks at all while rolling, continue to dust the top with cornstarch to prevent sticking. Place the parchment paper with the rolled out dough on it, onto the cookie sheet and refrigerate for 30 minutes.
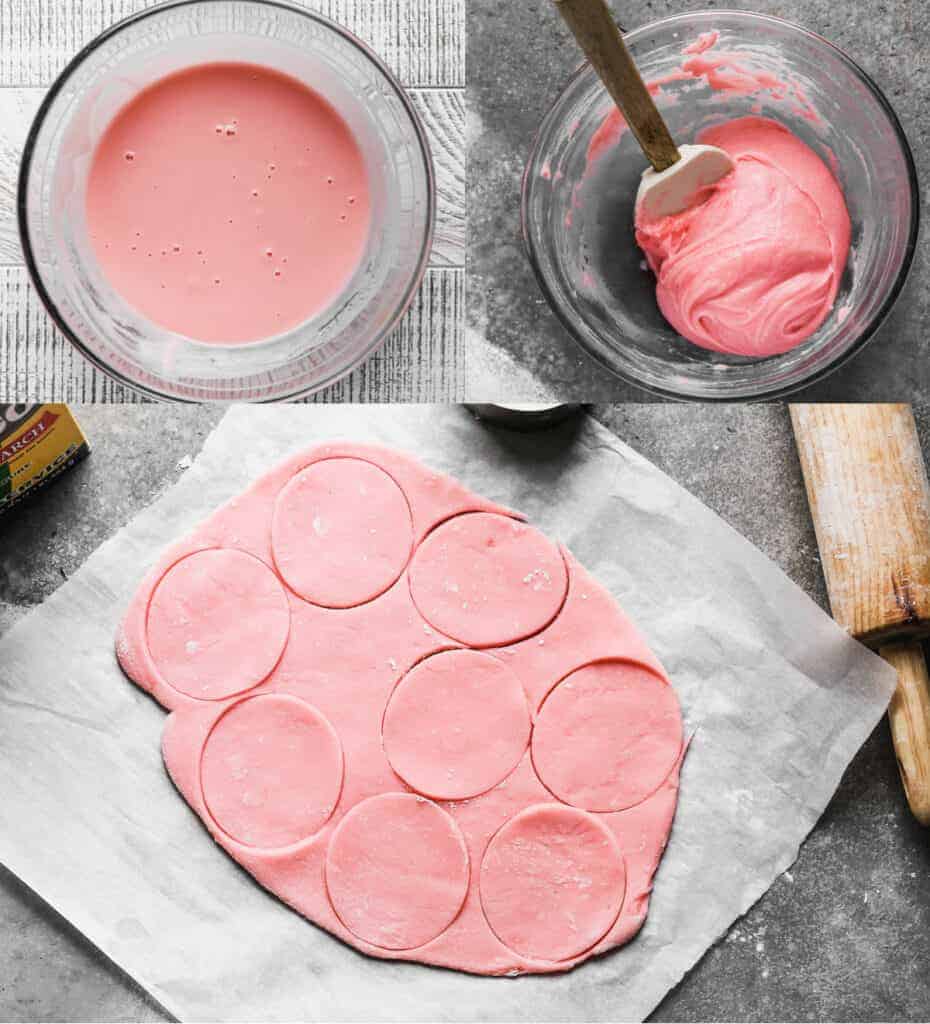 5. Fill mochi with ice cream: Remove the dough from the fridge and use a round biscuit cutter (about 3 inches) to cut circles in the dough. Your circles need to be big enough to pinch the dough around the ice cream. Pick up one circle of dough and gently brush off the cornstarch from the top (I like to use a dry pastry brush to do this). Working with one scoop of ice cream at a time, (keep the rest in the freezer so they don’t melt), place one ice cream scoop in the center of the mochi and gently press the dough around the ice cream. Pinch the edges of the mochi to seal it. Place mochi on a piece of plastic wrap bringing the corners of the plastic wrap to the center and twisting it tightly at the top.
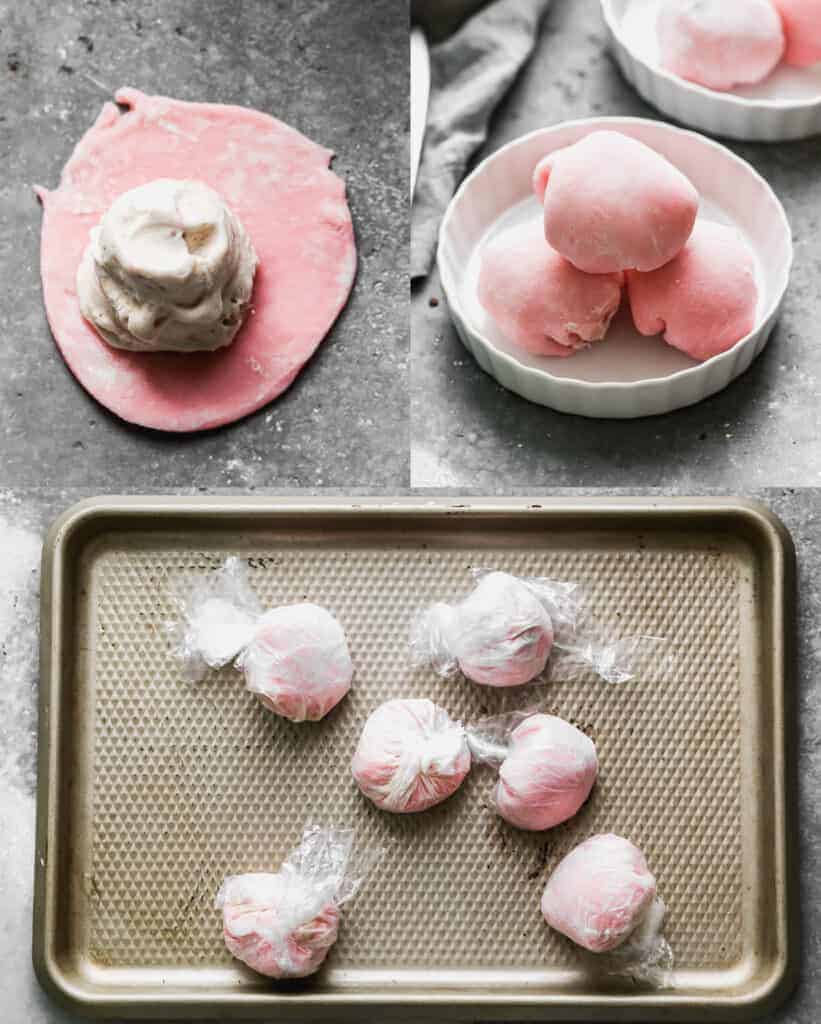 6. Freeze: Place mochi back in the freezer with the rolled plastic wrap side down. Continue with remaining dough and ice cream. Freeze mochi ice cream for at least 1 hour before eating. Once it’s frozen, store it wrapped in the plastic wrap and in a freezer safe bag or container in the freezer for up to 3 months. Allow the dough to thaw slightly before eating.
Recipe
Mochi Ice Cream
Ingredients
- 1 cup glutinous rice flour (Sweet rice flour, I recommend shiratamako or mochiko)
- ¼ cup sugar
- 2 Tablespoons powdered sugar
- 1 cup water
- food coloring , optional, to change the color of the dough
- Cornstarch , or potato starch (for dusting and rolling)
- Ice cream , your favorite kind
Instructions
- Freeze ice cream balls: Line a sheet pan with parchment paper. Working quickly, use a small ice cream scoop to scoop ice cream balls and place them onto the parchment paper. Be sure to pack the ice cream tightly as you scoop, leaving a flat edge on the ice cream so that it will sit flat on your cookie sheet. Freeze for 1 hour.
- Make mochi: Combine flour, sugar, and powdered sugar in a microwave safe bowl. Add water and stir well until smooth. Cover the bowl with plastic wrap and microwave mochi dough for 1 minute. Wet your spatula to prevent sticking and use your spatula to repeatedly fold the mixture. Cover and microwave again for 1 minute. Fold the dough again and microwave for 30 more seconds. The mochi should look slightly shiny and if it doesn't, microwave for 30 more seconds.
- Roll dough: Place a piece of parchment paper on the counter and dust with a layer of cornstarch. Use a rubber spatula to scrape the mochi dough from the bowl and onto the parchment paper (keep in mind that it will be very hot, so be careful not to touch it. Place the dirty dishes in the sink and soak them in water.
- Dust the top of the dough ball with cornstarch. Use a rolling pin to roll the mochi dough into a large rectangle. If the dough sticks at all while rolling, continue to dust the top with cornstarch to prevent sticking. Roll the dough to a thickness of 1/4''. Place the parchment paper with the rolled out dough onto a sheet pan and refrigerate for 30 minutes.
- Use scissors to cut large squares of plastic wrap (one for each ice cream ball). Each mochi will get wrapped in plastic wrap before freezing.
- Fill the dough: Remove the dough from the fridge and use a round cookie or biscuit cutter (about 3 inch round) to cut circles in the dough. Your circles need to be big enough to pinch the dough around the ice cream. Pick up one circle of dough and gently brush off the cornstarch from the top (I like to use a dry pastry brush to do this). Working with one scoop of ice cream at a time, keeping the rest in the freezer so they don't melt, place one ice cream scoop in the center of the mochi and gently press the dough around the ice cream. Pinch the edges of the mochi to seal it. Place mochi on a piece of plastic wrap bringing the corners of the square to the center and twisting tightly at the top to seal it.
- Freeze: Place mochi back in the freezer with the twisted plastic wrap side down. Continue with remaining dough and ice cream. Freeze mochi ice cream for at least 1 hour before eating. Once frozen, store it, still wrapped in the plastic wrap, in a freezer safe bag or container in the freezer for up to 3 months. Allow the dough to slightly thaw before eating.
Notes
- Vary the ice cream flavors: any flavor ice cream or sorbet will work!
- Swap the filling: instead of ice cream you could fill the center with nutella, chocolate, fresh cut strawberries, peanut butter, or traditional red bean paste (anko).
- Flavor the dough:
- Peanut butter: Mix in 2 Tablespoons of peanut butter right after the dough has steamed in the microwave.
- Chocolate/Cocoa Powder: Mix in 1 teaspoon cocoa powder before cooking.
- Matcha: Mix in 1 teaspoon matcha (green tea powder).
- Vanilla: Add one teaspoons of vanilla extract to dough before cooking.
- Coconut: Add 1 Tablespoon coconut milk to the dough before cooking
Nutrition
Did You Make This Recipe?
Tag @TastesBetterFromScratch on Instagram with #TastesBetterFromScratch!
Check out my webstory!
HAVE YOU TRIED THIS RECIPE?!
RATE and COMMENT below! I would love to hear your experience.
This post contains affiliate links.


It turned out wonderfully! I made sure to keep the mixture covered while microwaving, and kept the cornstarch close while I was working with the dough. Covering my rolling pin in cornstarch was very helpful. It was difficult wrapping the dough around the ice cream balls without it sticking to my fingers, but rubbing the cornstarch on my hands before helped a lot. They don’t look perfect, but I know with time and practice I will get better at handling the dough! Thank you for the yummy recipe!
How big of the scoop of ice cream should we make. Diameter would be good to know, or maybe measured in tablespoons. Thank you! Will be making it this weekend!
about 1.5 to 2 tablespoons of ice cream per ball.