
This post contains affiliate links.
These Homemade Caramels are perfectly soft and chewy and easy to make with a few pantry ingredients. We love to gift them to friends and family.
Want more candy recipes? I love these Chocolate Turtles, Buckeyes, Homemade Almond Joys, Chocolate Fudge, and Rocky Road!

Why I love these caramels:
- Family Tradition – This is my Mom's homemade caramel recipe we've been making at Christmas time for decades. They were always our food gift for friends and neighbors during the holidays.
- Perfect – They really are soft, chewy, melt-in-your mouth delicious caramels! They truly couldn't be any better! This is a treasured family recipe.
- Easy – This easy caramel recipe only uses pantry ingredients and the steps are simple. But the magic is in the cooking process – it's important to not rush these! Read my tips below for the best caramels every time.
How to make Homemade Caramels:
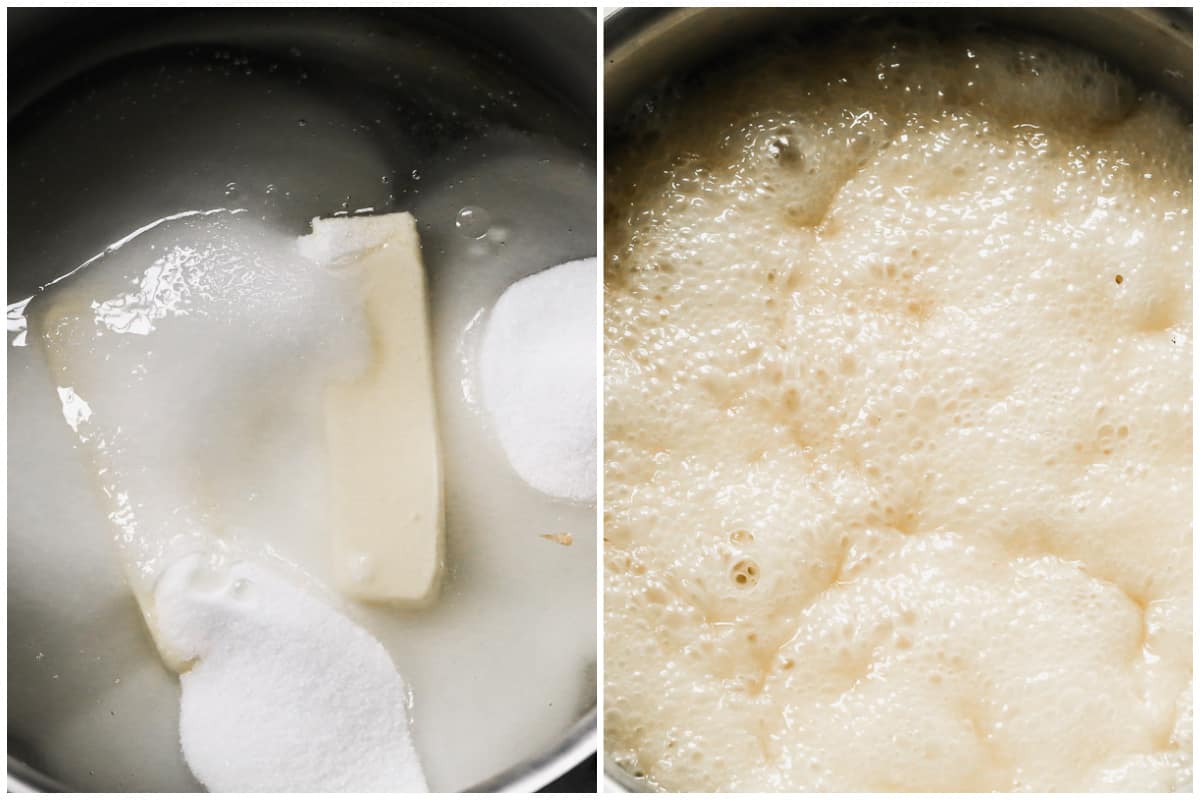
Combine: Add butter, sugar, and karo syrup to a large heavy-bottom saucepan then stir over medium heat until mixture begins to boil, about 5-10 minutes.
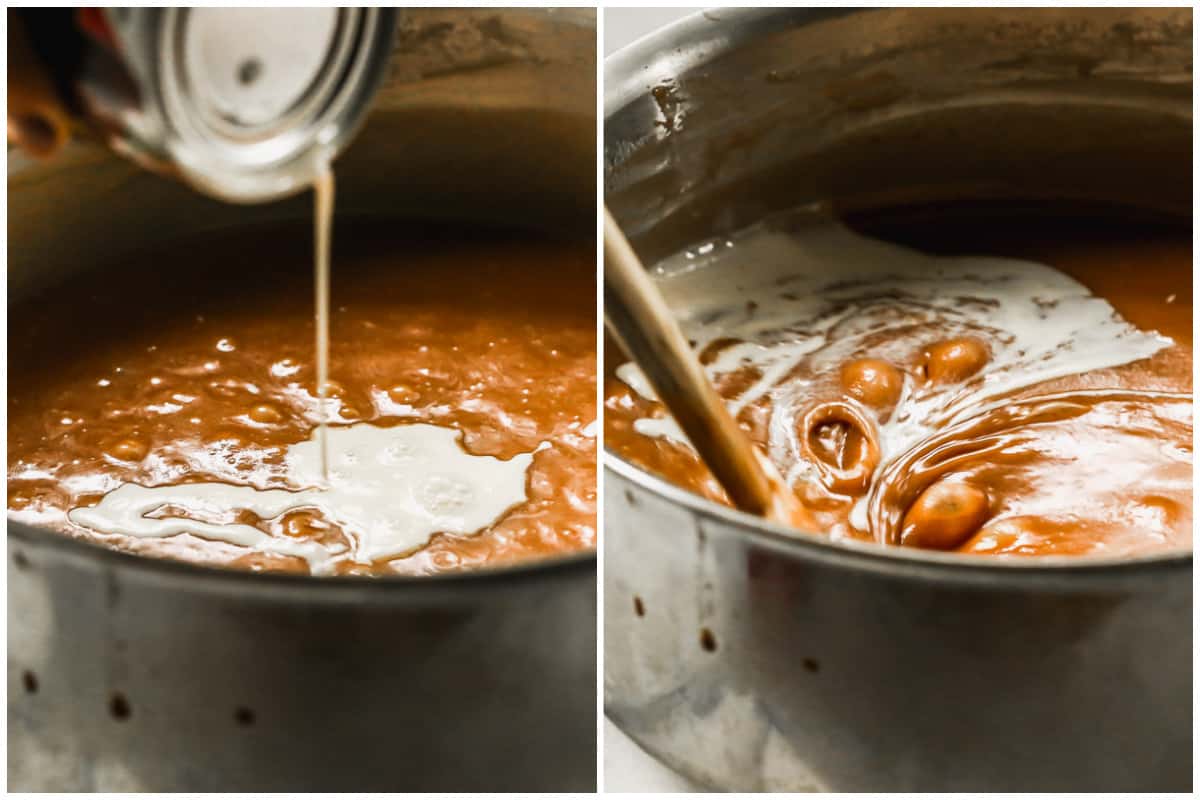
Add Evaporated Milk: Gradually add the evaporated milk, one can at a time, taking about 12-15 minutes PER CAN, while stirring constantly. Make sure the mixture maintains a constant boil, otherwise your caramels can curdle.
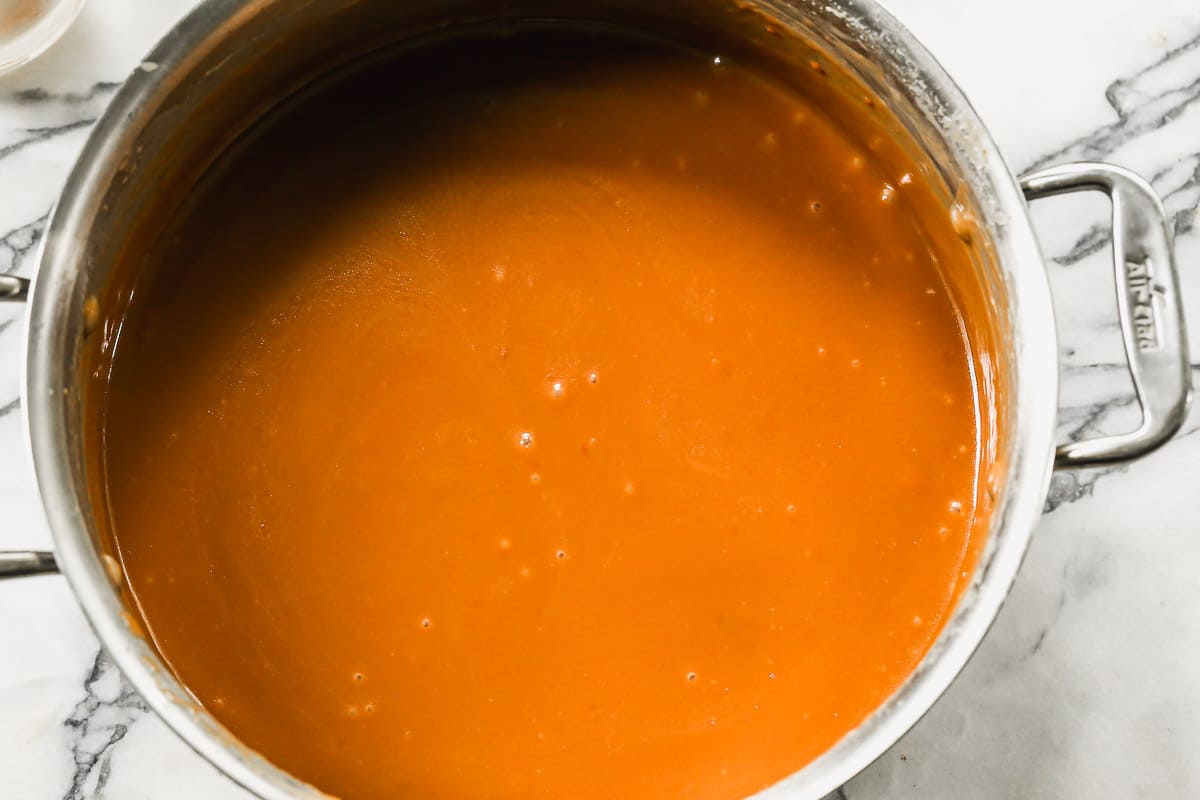
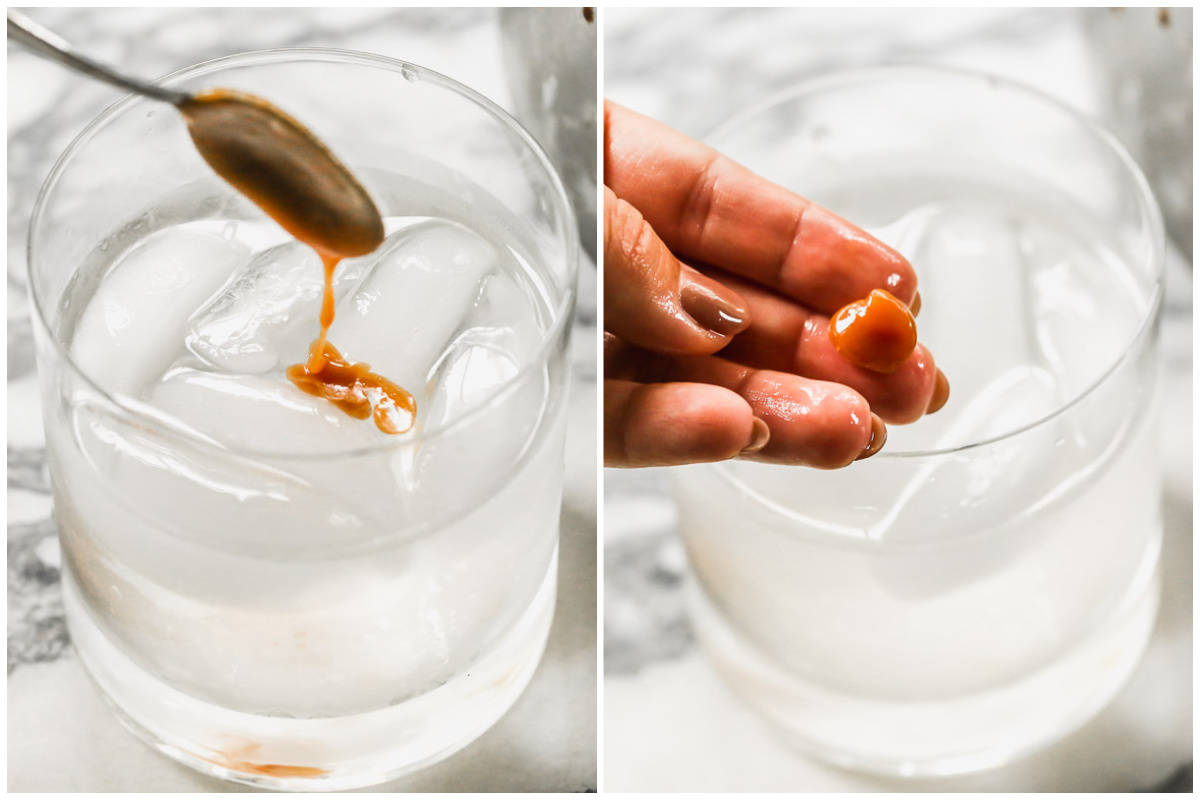
Caramelize: Stir the mixture constantly, scraping the sides occasionally, until it reaches a firm ball stage. I don't rely on a candy thermometer. I use the ice water test: Drop a spoonful of the hot caramel into a cup of ice water then mold the caramel with your fingers into a ball. You will know the caramels are ready when they feel pretty firm and pliable. Remove from heat then stir in vanilla.
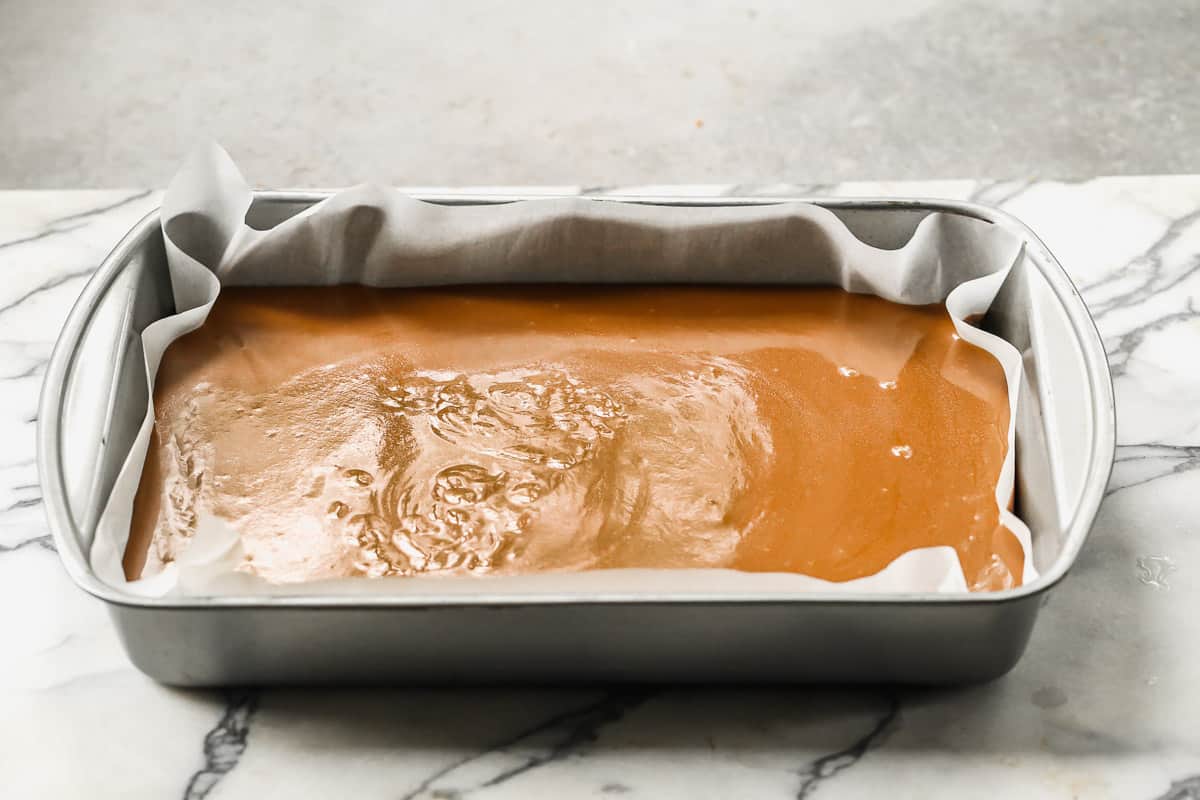
Cool: Pour caramels into prepared pan then refrigerate until cooled and hardened. (Best if you refrigerate them overnight, or for several hours. They will be easier to cut and wrap).
Cut: I like to use a stainless steel scraper to get perfectly even lines.
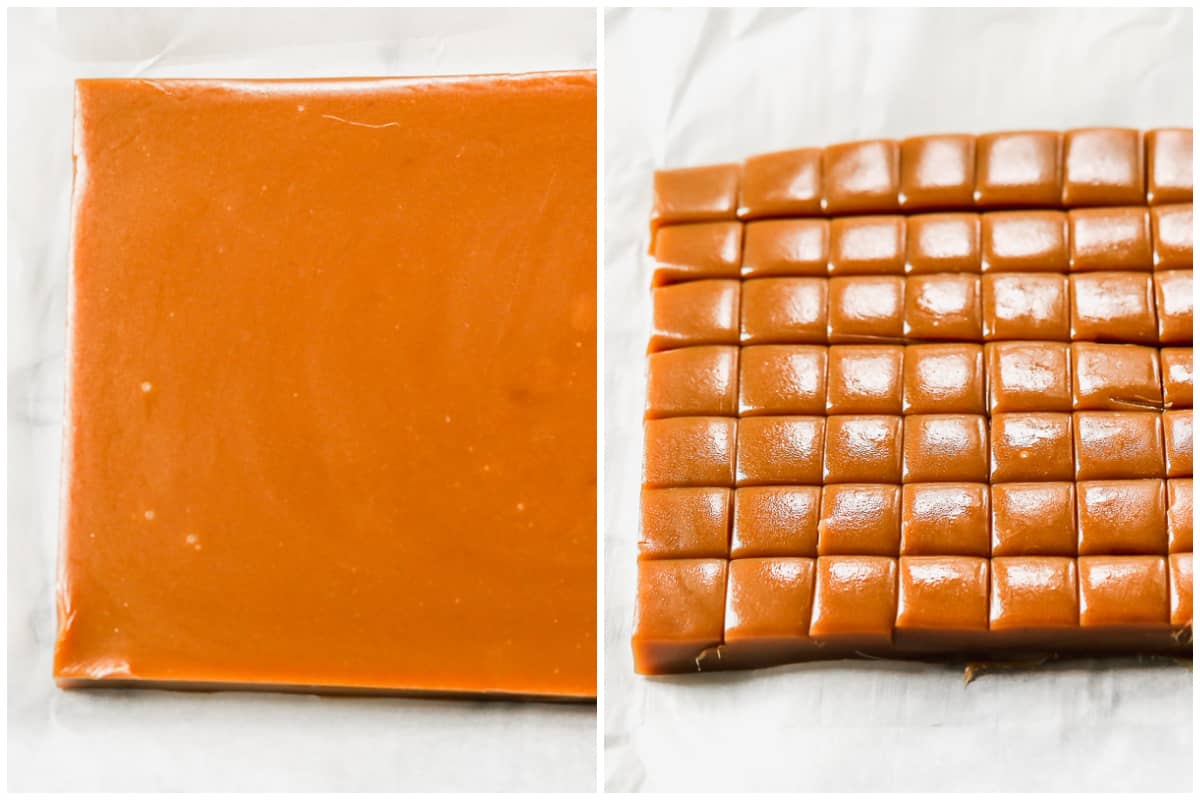
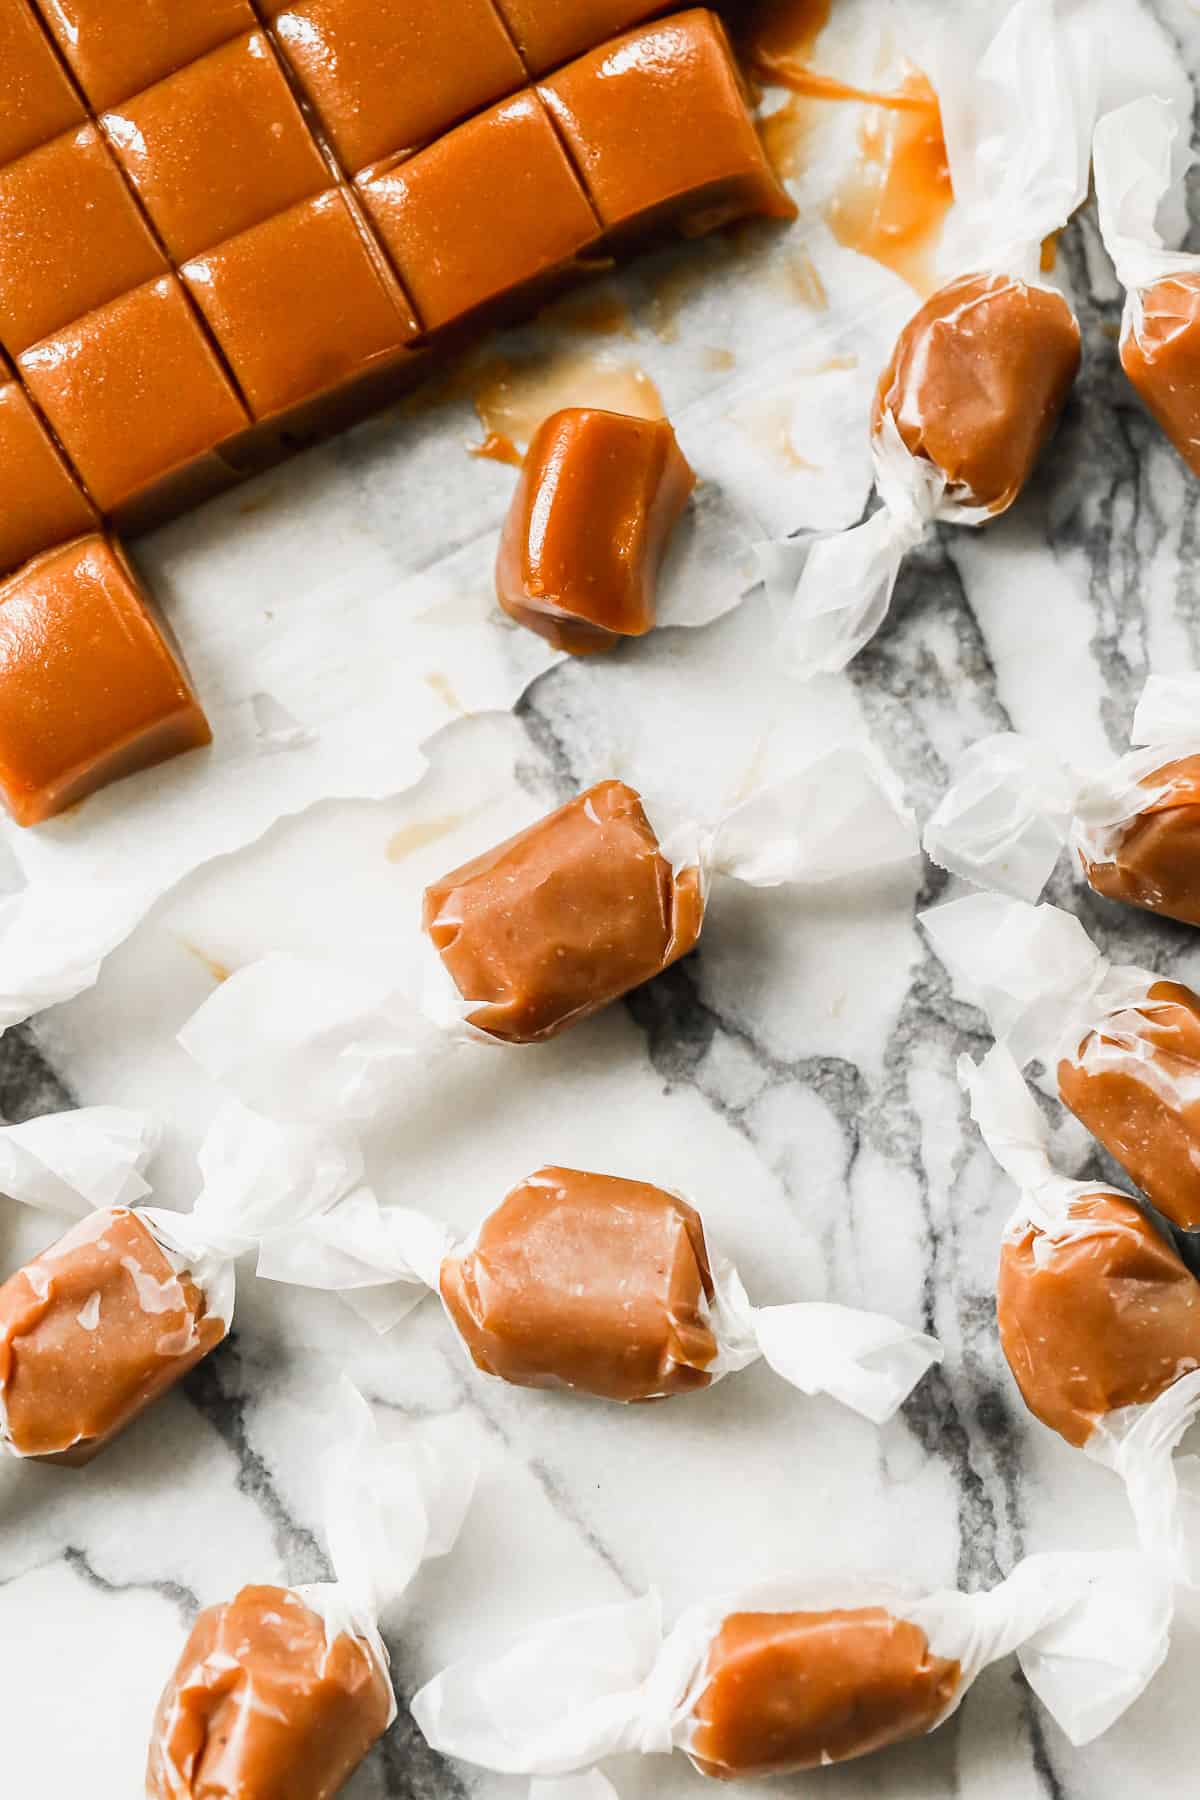
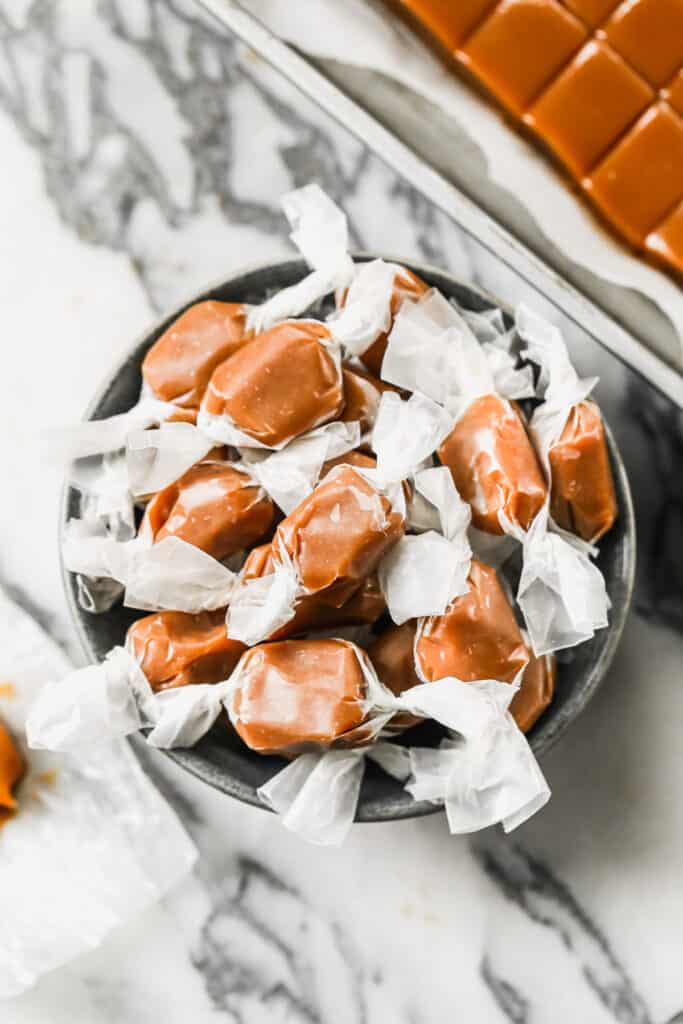
Wrap: The caramel will seem hard in the fridge after they're set, but they should be soft at room temperature. Cut soft caramels into small pieces then wrap like a tootsie roll in wax paper, if desired.
Tips for Perfect Caramels Every Time:
- SLOWLY stir in evaporated milk: This should take about 15 minutes per can, pouring in a little bit at a time (or warm your evaporated milk a little, to make the process faster). The caramel must maintain a constant boil the entire time.
- Maintain steady heat: Keep your burner/stove on medium heat to avoid any changes of temperature. Maintaining heat the same is why the milk gets added so slowly.
- Candy Thermometer vs Ice Water Test: I personally don't trust candy thermometers. Unless you take the time to calibrate yours, they can often be “off”. And depending on your location (altitude and humidity) 238°F may not be the perfect temperature for you. The best (and easiest) way I've found is using the ice water method. Drop a spoonful of the hot caramel into a cup of ice water then mold the caramel with your fingers into a ball. You will know the caramel candy recipe is ready when they feel pretty firm and pliable.
- Wrap them cold – I like to make them 24 hours ahead of time so they can get nice and cold in the fridge, making them easier to cut and wrap.
Make Ahead Instructions:
To Make Ahead: These easy homemade caramels will keep well in the fridge for several weeks. Take them out to come to room temperature for them to be soft and chewy.
More Caramel Recipes:
- Caramel Apples
- Caramel Popcorn
- Caramel Sauce
- Chocolate Covered Pretzel Rods
- Chocolate Covered Marshmallows
- Salted Chocolate and Caramel Pretzel Bars
Homemade Caramels
Ingredients
- 1 cup butter, (2 sticks)
- 4 cups granulated sugar
- 2 cups light corn syrup
- 24 ounces evaporated milk*, (2 cans)
- 1 teaspoon vanilla extract
Instructions
- Line a 9×13” pan or jelly roll pan with parchment paper. (If you don't have parchment paper you can generously butter the pan.) Either size pan will work–9×13” will yield thicker caramels.
- Add 2 sticks butter, sugar, and karo syrup to a large heavy-bottom saucepan over medium heat. Stir over medium heat until mixture begins to boil, about 5-10 minutes.
- Gradually add the evaporated milk, one can at a time, taking about 12-15 minutes PER CAN to slowly add it, while stirring constantly. You want to make sure the mixture maintains a steady heat and constant boil (no drastic changes in temperature) otherwise your caramels can curdle.
- Stir the mixture constantly, scraping the sides occasionally until it reaches a firm ball stage (about 240-245 degrees F on a candy thermometer). It takes patience and time, but it's sooo worth it! (Also, I don't really trust or rely on a candy thermometer–I like to test it the old fashioned way. Drop a spoonful of hot caramel sauce into a cup of ice water and mold it with your fingers into a ball. When ready it will feel pretty firm and pliable, but still slightly sticky.)
- Once you reach 240-245 degrees F / or the firm ball stage, remove from heat. Stir in vanilla.
- Pour caramels into prepared pan. Refrigerate until cooled and hardened. (Best if you refrigerate them overnight, or for several hours. They will be easier to cut and wrap).
- The caramel will seem hard in the fridge after they're set, but they should be soft at room temperature. Cut caramel into small pieces and, if desired, wrap like a tootsie roll in wax paper.
Notes
- Candy Thermometer: I don't always trust candy thermometers, and depending on your location (altitude and humidity) temperature will vary. A good way to test them is the ice water method. Drop a spoonful of the hot caramel into a cup of ice water and mold the caramel with your fingers into a ball. The caramel should feel pretty firm but pliable in the ice water.
- Caramel is too soft after it has set up: It needed to cook longer. You can pour the whole batch back in to a pot and warm it up again!
- Caramel is too hard: it cooked for too long. Use the ice water method to avoid this.
Nutrition
Nutrition information is automatically calculated, so should only be used as an approximation.
Text me new recipe ideas!
Simple, tasty ideas sent once a week. No spam.
Follow Me
I originally shared this recipe November 2017. Updated May 2020 and November 2023.


My batch got a little overcooked, probably because I haven’t had a lot of experience with making caramel, but tasted amazing. Getting ready to make a second batch, definitely not gonna cook them as long this time. Thanks for a great recipe!
I used the proportion in this recipe to make a small batch: 1 TB butter, 4 TB sugar, 2 TB corn syrup, 3 TB condensed milk. Microwaved on high, stirring every 30 seconds until 238*. Added 1/8 tsp vanilla, poured int ice cube tray. Makes 9 dainty caramels.
Good idea making a mini batch in an ice-cube tray! I’m wondering, did they come out of the ice cube tray ok? Did you grease it first?
I note that the evaporated milk needs to be added slowly so as not to change the cooking process. Could the evaporated milk be heated some before adding to he mixture to speed up the process?
I haven’t tried it, so I cant confidently advise you to pour more in. That theory makes sense, I just can’t say for sure.
Fantastic and easy to follow! Only question I have is, what is the best wrapping for them? I really would prefer not to use wax paper or saran wrap.
I use wax paper. If you don’t want to do that, you could place each in a mini paper muffin liner?
Help…my caramels taste great but are too hard! What did I do wrong?
I’m so sorry, that means they are overcooked. Did you use the ice water method to test them? I think that’s a better method than using a thermometer.
Great recipe, clear instructions and tips. Turned out great. Thank you.
Can I buy candy wrappers to individually wrap them?
Sure. I always use wax paper.
These are amazing! Definitely the best caramel recipe that I’ve come across. They even taste great without vanilla essence (I may have forgotten to add it in a couple of batches!)
Just a couple of questions. How long do these last? And do they have to stay refrigerated?
I’m so glad you liked them! You can store them at room temperature, they just dont do well with any heat, so somewhere cooler. They will last a very long time in the fridge–at least a month, if they’re wrapped (I’ve never been able to keep them around any longer than that!)
Thank you for this perfect recipe! I followed your instructions and the end result was beautiful. I wrapped them individually in parchment paper and I now have a huge bowl full of soft,yummy caramels. My Mom just left with a big pocketful and declared them delicious. Thanks again!
Hey Lauren,
Did you use salted or unsalted butter
In this recipe?
Salted
Could I use this for caramel apples
Yes, I used my caramel recipe here: There are my tips for perfect caramel apples. https://tastesbetterfromscratch.com/caramel-apples/